Template:Grp status
Welcome to Terraria!
This guide's aim is to help you get started on your journey through your world. It will cover basics like the interface, world exploration, bases, crafting, combat and where to go next.
Game mode
On Terraria's title screen you can pick a game mode to play. The available options are Single Player or Multiplayer on the ![]() PC version, or Play Game on the
PC version, or Play Game on the ![]() Old-gen console,
Old-gen console, ![]() Windows Phone, and
Windows Phone, and ![]() versions.
versions.
Learning how to play the game is easier in Single Player, so choose that option for now. This guide will assume you have chosen Single Player.
The ![]() Old-gen console,
Old-gen console, ![]() Windows Phone, and
Windows Phone, and ![]() versions also have a built-in Tutorial that we recommend completing before continuing on with the guide.
versions also have a built-in Tutorial that we recommend completing before continuing on with the guide.
Character Creation
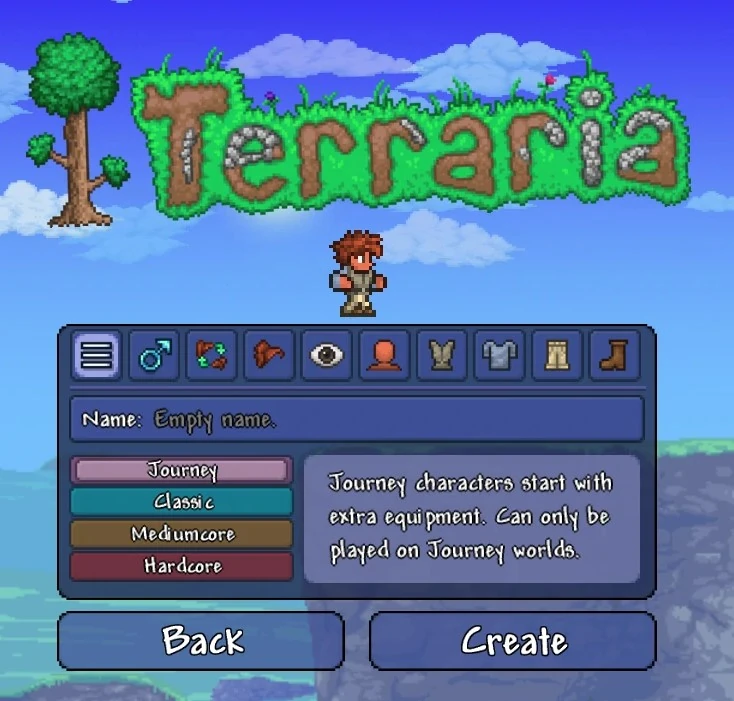

The character creation screen
After selecting the game mode, you will have to select a character. If this is your first time playing, you'll have to create your own. Clicking on the New button on the bottom right will open the character creation screen. Here you can change a number of your character's properties.
Note: None of the settings are mandatory and you can skip any number of them. You can even skip all of them and head directly to the next section, Finishing Up, below.
Appearance
The first four character properties change your character's looks: Hair, Eyes, Skin, and Clothes. Note: These settings are purely cosmetic and do not affect gameplay.
- The Clothes menu has four more options to choose from. The color of your clothes can be changed in-game using a
 Dresser.
- In order to pick colors, use the 3 sliders:
- The first slider is Hue: it changes the hue of the color;
- The second slider is Saturation: it changes the intensity of the color. The lower value makes it Grey;
- The third slider is Brightness: it changes the brightness of the color. It is also used to make black and white colors.
- In order to pick colors, use the 3 sliders:
- Hair color and style can be changed later with the help of the Stylist
NPC. However, it costs money, so choose wisely.
Gender
Aside from the cosmetic differences between the Male and Female characters, some town NPCs will change their inventory or dialog depending on the character's gender:
- If the player's character is Male, the Clothier will sell George's Tuxedo (
), the Stylist has 2 reserved quotes, the Party Girl has 1 reserved quote. - If the player's character is Female, the Clothier will sell Fabulous Outfit (
), the Stylist has 3 reserved quotes,the Pirate has 1 reserved quote.
You can change your character's gender after you create it later by using a Gender Change Potion.
Difficulty
You can choose a character difficulty setting in the ![]() PC version,
PC version, ![]() Console version,
Console version, ![]() Old-gen console version,
Old-gen console version, ![]() Mobile version,
Mobile version, ![]() Old Chinese version,
Old Chinese version, ![]() tModLoader version, and
tModLoader version, and ![]() tModLoader 1.3-Legacy version. In the
tModLoader 1.3-Legacy version. In the ![]() Windows Phone and
Windows Phone and ![]() versions, this option is not available, and all characters will be softcore.
Note: For your first Terraria experience, it is recommended that you leave your character in Softcore mode. It is the easiest mode, and will make learning how to play a more pleasant experience.
versions, this option is not available, and all characters will be softcore.
Note: For your first Terraria experience, it is recommended that you leave your character in Softcore mode. It is the easiest mode, and will make learning how to play a more pleasant experience.
The character difficulty setting determines what happens when the character dies - it does not affect any other aspects of gameplay, including how hard the enemies will be.
- Softcore mode is the easiest difficulty. It is also the default mode presented to the player. When the character dies, it will drop half (or 3/4) of the currently carried Coins onto the ground. The inventory otherwise remains intact, and any coins dropped this way can be retrieved from where they were dropped.
- Mediumcore mode is the second mode presented to the player. When the character dies, all items, coins, and ammo will drop. Just as with coins, the dropped items can be retrieved from where they were dropped. However, under certain circumstances items dropped this way can wind up permanently destroyed (for example, if they fall into lava).
- Hardcore mode is the hardest mode presented to the player - it is essentially permanent death. All items will be dropped, the character will turn into a ghost, and will be deleted upon logging out. Other players in a multiplayer game may help retrieve the dropped items, but in single player they are gone forever. This mode is not recommended for the purposes of this guide. (Note: Hardcore mode is not the same thing as Hardmode, which is an entirely different concept.)
Finishing Up
- Click Create to confirm character creation with the settings chosen.
- The next screen will prompt you for a name for your character. Multiple characters with the same name can be chosen, except on the Nintendo version.
This marks the end of character creation - the newly created character will be added to the list of characters in the menu.
At the character selection list, pick your character. The World selection screen will display.
World Creation
On this screen you are prompted to select a world. Clicking the New button allows you to create a new world.
First, you will be asked to select a world size. The different options are:
- Small - Small worlds are relatively compact. The various biomes are smaller, and closer together, sometimes causing some interesting World generation. Traversing the world is relatively easy compared to the other options.
- Medium - Medium worlds are larger than small worlds by a big amount. The biomes are larger, containing more treasure, but being harder to get to.
- Large - Large worlds are humongous. Travelling from the center of the world to one of the edges can take a new character over an in-game day.
Note: We recommend you create a small world for your first Terraria experience. Medium and Large worlds provide more space for exploration which you'll likely want once you've gained some experience, but as a beginner you'll appreciate having less distance to travel. Don't worry though, small worlds are still rather sizable, especially for a beginner.
After selecting a world size, you will be asked to choose between Normal and Expert mode.
- Normal worlds offer the standard Terraria experience.
Expert worlds have harder enemies, advanced boss fights, better loot and exclusive Expert items.
For now, select Normal, as it is the default Terraria experience.
Next you're asked to enter a name for your new World. Please type a name, and when done select Accept.
This marks the end of World Creation - the newly created world will be added to the list of worlds in the menu. At the world selection list, pick your world to load the game.
Beginning Gameplay
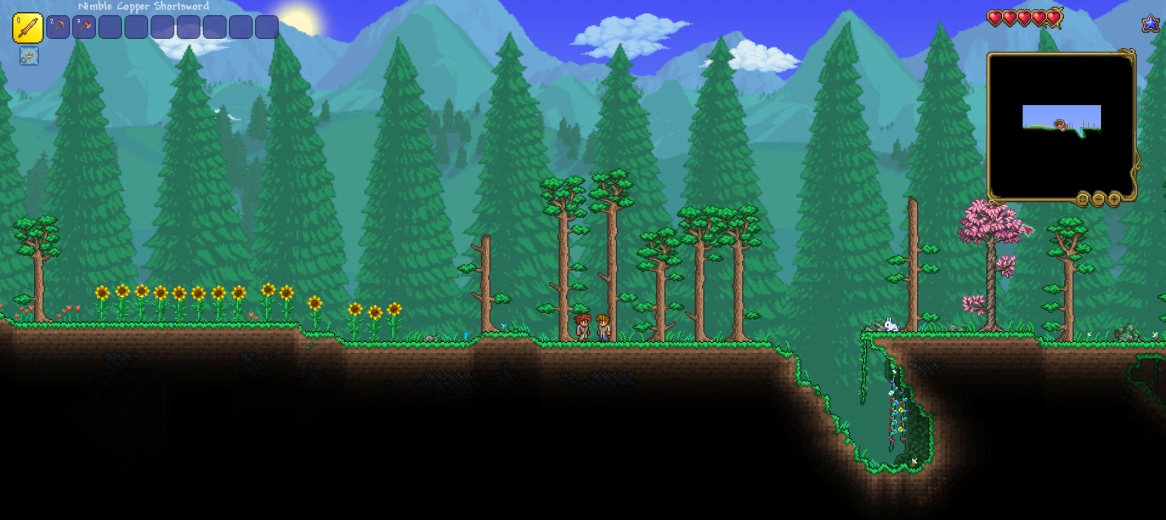

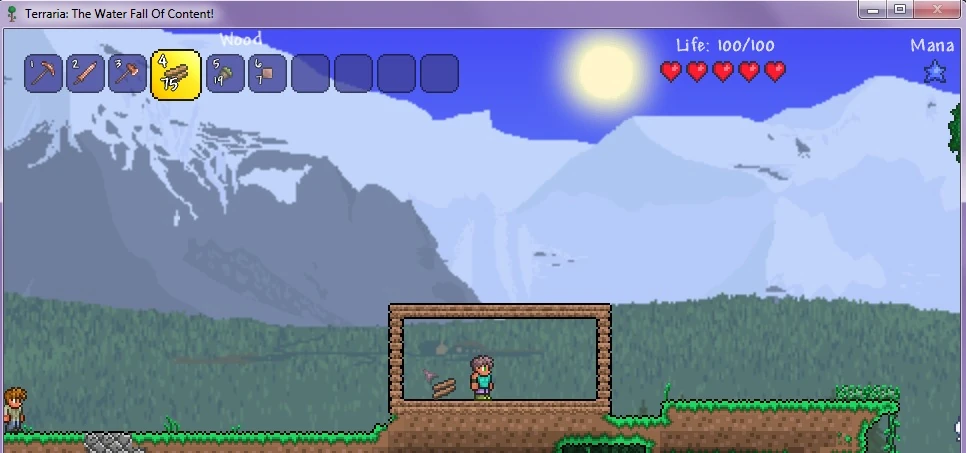
A sample Terraria world
Upon entering a world for the first time, your character will spawn (be placed into the game) at the center of the map, so you have half of the world to explore to the left, and half to the right. This location is known as the Spawn Point (or simply "Spawn") and will be where your character is placed each time you enter the world or respawn. Most world spawn points are located in a Forest biome but sometimes in a Snow biome, and very rarely a Jungle Biome as well. It's recommended that you remember where this spot is, since building a house at spawn can be very convenient.
Note: The spawn point can be changed later using Beds.
Let's take a look at the game interfaces.
Movement and Tool Use
- On PC version, the game is controlled using the mouse and the keyboard. If you are using a controller, please see the console controls below.
- The cursor on the screen is moved using the mouse.
- Left Mouse or ⚒ Use / Attack will use the item currently selected in the hotbar, or attached to the cursor.
- The WASD keys move the character.
- The Spacebar or ↷ Jump will make the character jump (or fly if it has wings equipped).
- The Right mouse or ⚷ Interact will interact with entities like Chests, Doors and Town NPCs.
Hotbar and Inventory
The Inventory
In the upper-left corner of the screen you can see ten inventory slots labeled 1 through 10. These slots are referred to as the hotbar. They are a quick way of accessing commonly used items. You can place any item in them in the inventory. To use the item, select the hotbar slot by pressing the associated number on the number row on the keyboard, use the scroll wheel to scroll to the right slot, or click a slot with the cursor. When you have selected the right slot, you can click somewhere on the screen to use the selected item.
By pressing Esc or Inventory you open up the inventory. It consists of 40 inventory slots, 10 hotbar slots, 4 coin and ammo slots, a trash slot and the equipment slots. It also houses the crafting menu, which is used to craft items.
All newly created characters begin with the following items in their inventory:
- Copper Shortsword
orWooden Sword , used for stabbing/swinging at enemies. - Copper Pickaxe, used to dig blocks, as well as detaching placed items like furniture.
- Copper Axe, used for chopping down trees to obtain wood.
Note: items have a chance of being obtained with a modifier such as "Light Copper Pickaxe". Check the Modifier page for more information about them. This guide does not cover them in detail.
Rearranging the Inventory
Items in the inventory can be moved using the cursor. Clicking on an inventory slot with an item in it will attach the item to the cursor. In this state, clicking on an empty slot will place the item in said slot. Clicking on a slot that already contains an item will swap the two items. Moving the cursor out of the inventory while still keeping the inventory open allows the item to be used without having to be moved to the hotbar. Note that this will only work when the autopause option is disabled.
Certain inventory slots act in a special way.
- The hotbar slots can be selected even when the inventory is closed.
- The ammo slots can only contain items that are ammunition.
- The coin slots can only contain coins.
- The trash slot will store one item, but instead of swapping the items when another item is placed in, the item already in the trash slot will disappear.
- The equipment slots can only store certain kinds of equipment, we will get into this later.
Other interface elements
The red hearts
beside the inventory indicate the character's Health. Each red heart is 20 health.
All characters begin with 100 health points (indicated by five hearts) and can currently go up to 400 using ![]() Life Crystals, then further boosted to 500 with
Life Crystals, then further boosted to 500 with ![]() Life Fruits, found only in Hardmode.
Life Fruits, found only in Hardmode.
Health starts regenerating after a short period of not taking damage. Standing still increases the rate of regeneration.
The blue star on the right side of the screen indicates the character's Mana. Each blue star is 20 Mana.
New characters start with 20 Mana, represented by 1 star. As the maximum Mana is increased by using ![]() Mana Crystals, additional stars will be displayed below the original. You can have up to 200 Maximum Mana, which are 10 stars in total. You can further increase Mana by equipping specific Armor and Accessories.
Mana Crystals, additional stars will be displayed below the original. You can have up to 200 Maximum Mana, which are 10 stars in total. You can further increase Mana by equipping specific Armor and Accessories.
Mana regenerates shortly after Mana usage is stopped, and at a much faster speed compared to health regeneration. Not moving also increases the Mana regeneration rate.
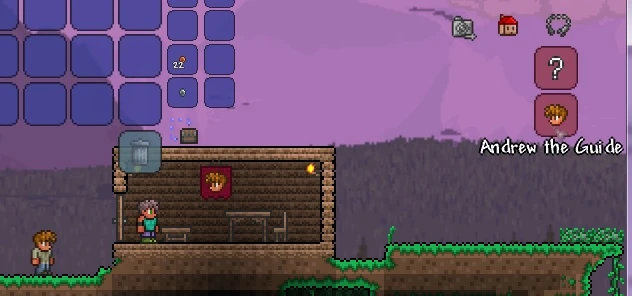
The First Day
After loading up the world your character will be standing at the spawn point, with an NPC nearby, the ![]() Guide. You can talk to him with by pressing ⚷ Interact with your mouse over him. He has some tips for new players, and will show you the available crafting recipes if you give him a material.
Guide. You can talk to him with by pressing ⚷ Interact with your mouse over him. He has some tips for new players, and will show you the available crafting recipes if you give him a material.
Digging and Placing
To dig, you first select your pickaxe. In this case that is the Copper Pickaxe. You are going to use this tool a lot, so you want to keep it on your hotbar. If you now move the cursor over a block near your character and press ⚒ Use / Attack. After a few swings at the block, it will disappear and turn into a collectible item. Standing close to an item will cause you to collect it which will put it in your inventory.
To place blocks, select a block by either putting it on your hotbar and selecting the hotbar slot or attaching it to the cursor and moving the cursor out of the inventory screen. Now move the cursor adjacent to a nearby block and click ⚒ Use / Attack. You will place the block. Holding down the button and moving the cursor to another empty space adjacent to a different block will place another block.
You can remove any previously placed blocks by digging them back out with your pickaxe, even the block originally connecting to the ground - blocks above it will not fall due to gravity. There are some exceptions, such as ![]() Sand and
Sand and ![]() Silt, which do fall when there are no supporting blocks below them.
Silt, which do fall when there are no supporting blocks below them.
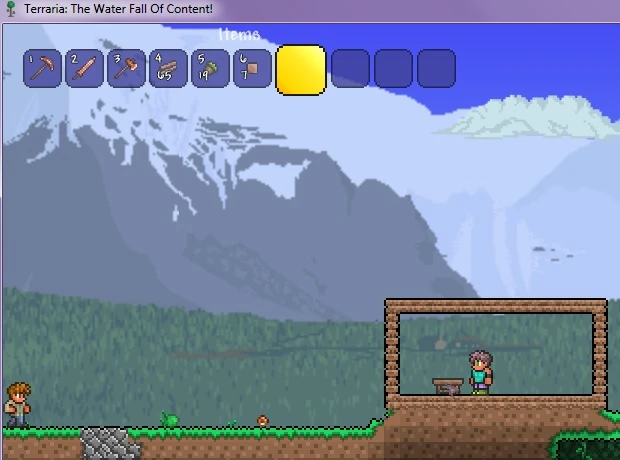
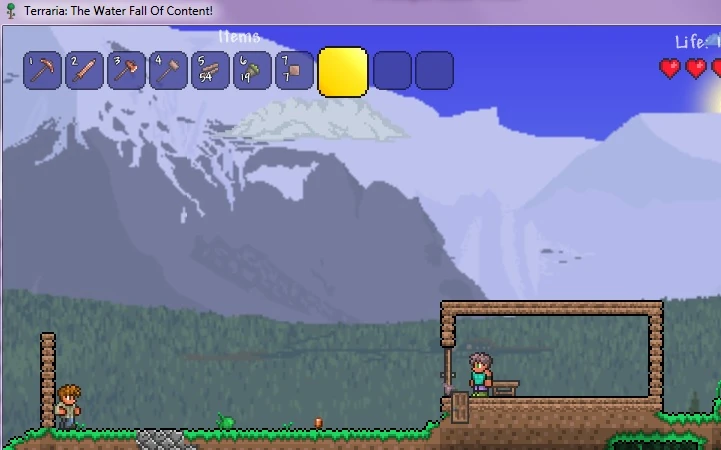
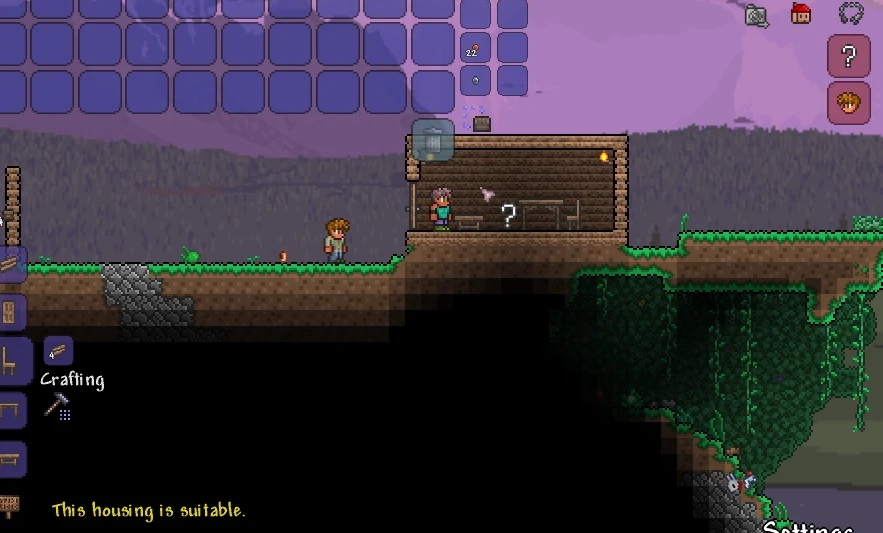
Building a house
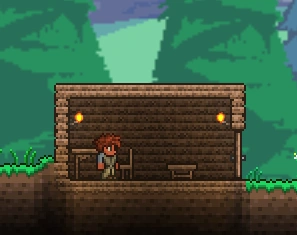

A basic house for the first night in Terraria
A good first activity when starting a new world is building a house. A house is an enclosed area with background walls and certain other requirements that shields you from monsters, and allows NPCs to move in. Building a house will provide shelter from enemies during the night, helping you survive early on.
Every world spawns with you and the Guide at the spawn point. He is a valuable resource of information and help, so we want to protect him.
- Wood is a versatile and plentiful resource, so use your Copper Axe to cut some Trees down.
- If a monster approaches you, switch to your weapon (which is different depending on the game version) and kill it.
Once you have collected about 200 wood, return to where you initially spawned and dig out 1 block underneath where you first appeared.
Time to get building!
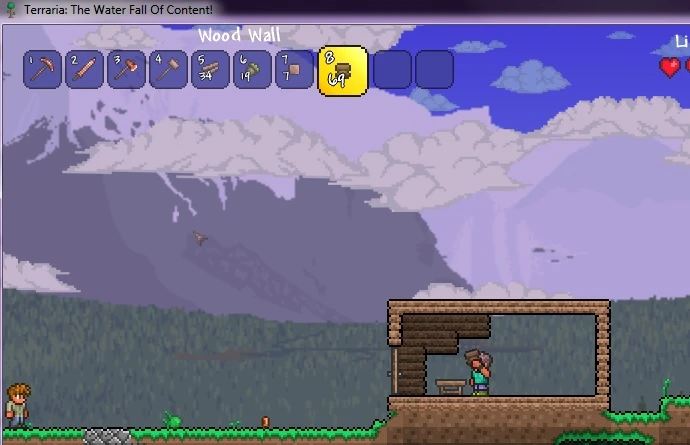
- Steps of building a suitable House
1. Lay down the wood foundation;
2. Make a box;
3. Craft a
 Work Bench;
4. Place the Work bench down;
5. Craft 1
 Door and replace a side wall with it; (tip: replace both walls if you want mobility)
6. Craft some
 Wood Walls and cover the interior of the house with it;
8. Assign the house to an NPC, in this case the
Guide.

- Tip: Work Benches are considered Tables for purposes of NPC Housing. You can replace Tables with them. For more info, consult Housing.
If you find yourself unable to build a house before sunset, you can dig yourself 4 blocks into the ground, and cover yourself up with dirt.
When Night falls, all NPCs will return to their designated houses and stop moving. NPCs without housing will walk around aimlessly, although this generally doesn't happen because NPCs only spawn into a world when their requirements are met in addition to there being an empty house for them to move into. Still, it's possible to dismantle a house after an NPC moves in, leaving them stranded. You can temporarily surround them with blocks of dirt to prevent monsters from reaching them.
Continuing on
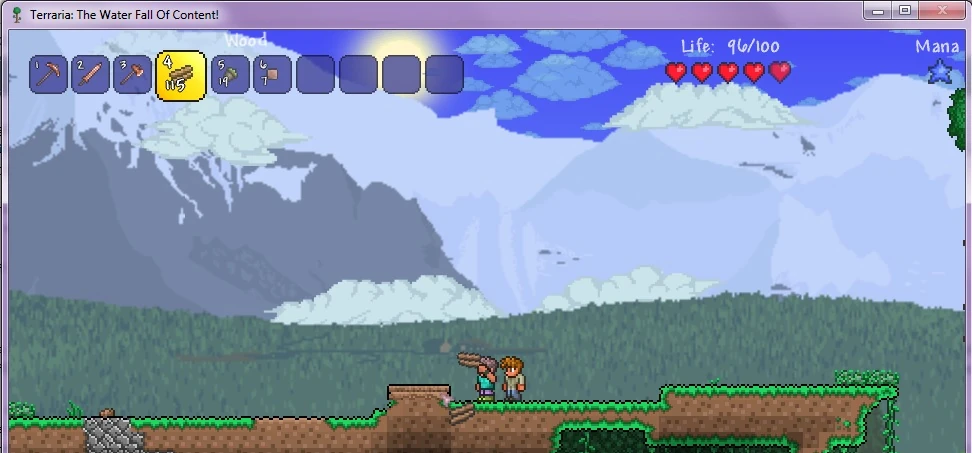
Combat
The red numbers are the damage dealt to the character; the orange numbers are the damage done to Monsters.
During your adventures in Terraria you will encounter many enemies. To fight them you use weapons. There are 4 main types of weapons:
- Melee weapons: These weapons are the most straight-forward. They are weapons that physically hit the enemy like Swords, Boomerangs and Flails.
- Ranged weapons: These weapons use a form of ammo to fire projectiles at distant enemies. Examples are Guns and Bows.
- Magic weapons: Magic weapons have various different attacks, but generally they shoot a magical projectile that costs Mana. Examples include the different Spell Tomes and Staves.
- Summoning weapons: These weapons use a small amount of mana to summon a minion that automatically targets enemies and combats them itself. Examples include the Slime Staff and Hornet Staff.
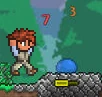
In Terraria, any damage done to the player will appear above their head as a red number. Damage done to enemies by players is shown with an orange number. When the player heals, the amount will be shown as a green number.
Taking damage and dying will be an inevitable part of life in Terraria, and unless the player has set a Spawn point, they will re-spawn at the world spawn point.
Enemies in Terraria drop coins, as well as enemy-specific drops. Certain drops have higher '"Drop chances"' than others, so farming for specific items may be required.
Healing
To avoid dying, the player can heal themselves using one of several healing items.
- At the start of the game, a decent way to gain health is by eating Mushrooms. These spawn naturally on grass blocks in a Forest biome. To harvest them, simply swing a tool or weapon at them, and you can pick them up. Consuming one will restore 15 health.
- Note: Consumables like these give the Potion Sickness between uses. It prevents you to use any more healing items for 60 seconds, so it's a good idea to avoid taking damage as much as you can.
- Note: Consumables like these give the
- While exploring the player will find better Healing Potions. These will restore more health, but the Potion Sickness effect won't last any longer.
Mining and Exploration
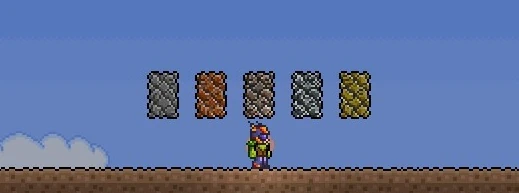  1. Ore types from left to right: Stone, Copper, Iron, Silver and Gold  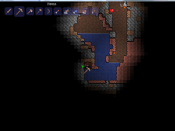 2. Digging out an air pocket.  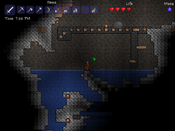 3. A gapped bridge, also a Mother Slime. It's time to begin the wonderful process that is getting upgrades, as there are no advancement paths apart from the power that comes from better gear. However, a Workbench will not be enough to craft our gear; a Furnace is needed. A Furnace will serve to transform Ore into Bars (and can also be used to make glass and ceramic items), which are the main building materials of weapons, tool, and armor . Venture out and find deposits of Stone, and mine up at least 20 blocks of stone. Torches are also needed for creating a Furnace, so make sure to kill a few slimes to get a bit of Gel. Finally, a small bit of Wood is all that's needed. Head to the Workbench and craft a Furnace, then place it down. Ore is a fundamental material in Terraria, and in order to survive the later sections of the game you will forge and create a lot of Bars. While exploring the world keep an eye out for odd colored blocks as these will most likely be ore deposits. The picture to the right (1) shows the five most common types of ore and stone. We also need to make an Iron Anvil or Lead Anvil (some worlds will have lead instead of iron). Anvils are used to create items from bars. Go out and find some Iron Ore or Lead Ore. In order to smelt one Iron Bar/Lead Bar, three Iron/Lead ore must be present. As we need five bars total; to successfully create the Anvil we need 15 Iron/Lead Ore. Once the ore is gathered and smelted at the Furnace, head to the workbench and create an Iron/Lead Anvil (you can also buy an anvil from a Merchant for 50 silver). When placed down (preferably next to the Furnace) an entire new set of Recipes become available. The surface has its share of ore, but in order to get the best items in the game, you have to dig a bit deeper. It is highly advisable to begin gathering materials for a few Buffs. A fresh character on a new map can quickly gather Sand and Daybloom necessary for some early buff potions, as well as the Daybloom Seeds and Clay used to begin Gardening with Clay Pots. All Buff potions use Bottled Water, at least one of the seven Herbs, and in most cases another item such as Ore, enemy drops, or other naturally occurring objects. Two of the earliest buffs that can be easily concocted are the Regeneration Potion and the Ironskin Potion, and for the early game can significantly improve your survivability. Cave explorationThere are a few options when choosing how to dig: Digging straight down or searching for an open cave to explore. At this early stage in the game use caution when digging holes. Using the blocks picked up while digging or creating Wood Platforms, you can construct a way back. Another thing to watch out for is deep caverns. When falling great distances the character will take damage. When underground there will be no light. To illuminate your area and see, you can hold a torch in your hand by putting a torch stack in your hotbar and selecting it. However, you will be unable to use anything else while holding the torch. You can stick a torch on a wall or on the ground by left clicking where you want to place it. This will not only let you see mobs so you can fight them, but you can leave behind a trail of torches to see mobs coming at a greater distance, mark the way back out, and show where and how far you've gone if you come back to the same cave to explore further. In addition to placing torches, you can throw one (the T button by default), which is useful for seeing what's at the bottom of a pit, and how far down it goes (unlike with all other items in the game, throwing a torch only throws one item in the stack, instead of the whole stack). When exploring caves you will frequently come across pots. You can smash these with a weapon or tool to get some loot. Less common are chests and golden chests. When you are near or in front of a chest you can right click, which will show your inventory and below your inventory the contents of the chest. You can click on a chest item to grab it, then click again on an inventory square to put it in your inventory. Alternatively, you could click "Loot All" to the right of the chest contents grid to grab everything in the chest. Once the chest is empty you can repeatedly hit it with your pickaxe in order to pick it up and take it with you, and then place it elsewhere like you'd place any other piece of furniture (if the chest isn't completely empty then it will remain there no matter how many times you hit it). It's recommended that you take a few of the chests you find back to your house to store stuff with, since crafting your own chest or barrel uses Iron Bars, and you'll want to save up your iron for other purposes. Another thing you'll run into underground is cobwebs, which slow you down when you try to move through them. You can cut them down with any weapon or tool and then pick them up. Harvested cobweb can be turned into silk, which is used to make a bed, which can be used to change your spawn point. Silk can also be used to make some type of decorative items and vanity clothing, or can be sold for two silver coins a piece if you need money. Harvested cobweb itself can be placed like furniture or a torch – select it and left click –, either for use as decoration, or placed at the bottom of a tall pit to break your fall for preventing fall damage. While mining underground it is possible to come across pools of water. Torches do not work underwater. Glowsticks work underwater, but they cannot be crafted and must be found at this stage of the game. Also, they cannot be attached to blocks. You can throw them, but they will bounce and move around and may be hard to place exactly where you want them. You can craft Sticky Glowsticks anywhere by combining Gel with a Glowstick; these will stick to walls when thrown, making them easier to place. No matter which you use, however, glowsticks are not permanent when thrown, unlike placed torches, though they do last for 5 minutes. Also note that just as with other projectiles, a glowstick should be thrown with the attack command. The default button to "throw" an item is the "T" button, but using this method the entire stack of glowsticks will be thrown. Using the throw command is for dropping a stack of the item from your inventory on the ground. Instead, you should use the attack command, which throws an individual glowstick. When stepping into a pool of water the character will sink as if weighted down. Don't fear diving down underwater to continue moving downwards, as the character has a rather large air meter. However, if close to running out of air there is a way to regain air quickly. First either find a wall or make a small shaft at the bottom of the water. (The shaft should be around 10 squares deep) Then dig a tunnel in the wall and then dig upward in the ceiling. The water will not fill the upper squares. As the air supply runs low jump into the hole. This will restart the meter. (2) There are many deep chasms inside the caves. An efficent way to traverse them is to create a gapped bridge (3). To do this create a background wall of any material. Stone and dirt will be in excess so those are recommended. Place a strip as far as the character can reach then build stepping stones at least one block apart. There are two benefits to this:
Note that the character cannot pass through the one space gaps either; so it would be a good idea to leave an opening somewhere along the bridge. |
Afterward
Now that you've learned how to play and survive, the best thing to do would be to simply continue playing, discovering new things on your own. If you do get stuck, find something you're unsure about, or simply want detailed information about one of your items, look up what you need on the wiki, or check out the wiki's Walkthrough. It may be handy to check the Armor or Weapons pages for info on what direction to head next. You might also want to look at the pages about the Bosses of the game so you know what your long term task will be. And remember, you can play the game your way, so don't feel bound by the information on this wiki.
Tips
- Exiting the game then re-entering the world will bring you back to your spawn point.
- If you find Sunflowers, place some around your surrounding. It gives some helpful bonuses that can make surviving easier.
- It's best to build your base close to the original Spawn point so you have less trouble returning to it at Night or if you respawn.
- When digging very deep, it's convenient to leave a way back up. The easiest way would be to leave Platforms jutting out on a side of the passage as a makeshift ladder, or placing Ropes while digging the shaft.
- Torches last forever so bring plenty along and place them liberally when going mining and exploring.
- Avoid the Corruption / Crimson early on as they contain tough enemies.
- If you want an anvil but do not want to use bars or money, you can find them in ruined houses underground.
- If you have trouble with water destroying torches and blocking you from using them, use glowsticks instead.
- If you go find your Dungeon early there is a chance you can obtain a Water Bolt, a powerful early-game Magic Weapon.
- Finding a Living Tree is a easy way to get a free NPC house by placing torches.
More information
For more advanced information, please check out the guides listed below.
Crafting 101 - This is the introductory crafting guide. It contains a detailed explanation of how crafting works, and the ideal crafting station setup.
NPCs - There are more NPCs than just the Guide that you'll want to make homes for.
Bases - How to create an effective homebase.
Mining techniques - This guide goes into detail on easy and efficient ways to mine ore, and what to expect when venturing deeper into Terraria.
Gardening - How to grow gardens of Trees, Mushrooms, and other less savory things. This is a wonderful guide for learning how to properly organize and maintain a garden.
List of Weapons - All the weapons you might find on your travels will be explained here.
PvP - A great place to start when looking for information on Player vs. Player combat. Not quite for beginners, however it's a great read for those who would like to study beforehand.
Eye of Cthulhu Boss Fight - One of the Bosses a player might run up against early on in their worlds.
List of Bosses - A list of all the Bosses players will come in contact with in their worlds. Bosses are powerful monsters that have a lot of health and do devastating damage to the unprepared.
All guides have the following list of Guide pages, such as below, that you can use to move between guides very quickly. Use those if you want to learn more things.
- Getting started
- Practical tips
- Walkthrough
- Mining techniques
- Invasion events