Welcome to Terraria! Whether you are a new player, or perhaps a returning player who can’t remember if it’s Blinkroot or Moonglow that goes in that Night Owl Potion, hopefully, this guide can be of some help to you. At least it might be more useful than the Guide.
When progressing through Terraria, many players can be confused about where they should go and what they should do next. This is not a design oversight: Terraria is an open-ended game; you are not forced to go anywhere or do anything. You are free to set your own goals and follow through with them, whether you are a builder, fighter, explorer, collector, or whatever else. This walkthrough merely aims to provide a logical order of progression through Terraria’s many different environments, called biomes, generally in order of increasing difficulty. But there is certainly no requirement to visit each biome, or even in this order.
If you are unsure of what map size to choose as a new player, choose small. Even in a small world, a player can face long travel times, and it would still take hundreds of hours to explore every cave in a small world at a normal pace.
New players may also want to refer to the Getting Started Guide. Template:Toclimit
On the creation of a new world, a funny yet helpful person will spawn, and he is called the guide. If you are new to Terraria, then chat with him and he will give you advice on different elements of your world. But upon hardmode, his tips often become useless and unnecessary because you will either already know or have used them.
Starting Out
Forest Biome
Monsters: Green Slime, Blue Slime, Purple Slime, and Pinky
Notable Resources: ![]() Wood,
Wood, ![]() Copper or
Copper or ![]() Tin,
Tin, ![]() Iron or
Iron or ![]() Lead,
Lead, ![]() Cobweb,
Cobweb, ![]() Mushroom,
Mushroom, ![]() Daybloom,
Daybloom, ![]() Sunflower,
Sunflower, ![]() Yellow Marigold
Yellow Marigold
Notable Chest Contents:
- Weapons:
 Blowpipe, Grenade, Shuriken, Spear, Throwing Knife, Wand of Sparking
,Wooden Boomerang - Accessories: Aglet, Climbing Claws, Radar
,Guide to Plant Fiber Cordage, - Other: Bottle, Glowstick, Umbrella
Recommended Equipment: Starting equipment
Recommended Life:New players will almost always spawn in the Forest biome. During the day, this biome has the weakest monsters in the game.
A newcomer could easily be lulled into a false sense of security upon entering into the bright world surrounded by cute bunnies and harmless slimes. Don’t be deceived. You have 11 minutes and 15 seconds before night falls and you are ripped into pieces by packs of zombies, if you are not prepared. Your goal in the daylight remaining to you should be to kit yourself out with some better starting equipment from your surroundings and find a source of shelter, preferably underground, to pass the night.
The first thing you should do is cut down several trees (using your axe, aim for the lowest block), as wood is needed for many things, then build a Work Bench. From there, craft a Wooden Sword, and perhaps a Wooden Bow, as your starting weapons are next to useless.
Next, you should explore your surroundings. There are usually a few Chests and Pots on or near the surface near your starting point, which will often contain useful weapons and other items. If you are lucky (a 9% chance per chest), you’ll find a Spear, which is one of the best starting weapons, especially against zombies, the biggest threat at this point. If you can find enough Cobwebs near the surface (you'll need 20), you can also make a Wooden Yoyo, which is finicky, but a solid starting weapon. There will also almost always be at least one cave entrance close by leading Underground. Use Ropes and Platforms to reach high ledges, bridge chasms, and safely descend. Always carry blocks around with you so you can fall safely!
Once you have explored your surroundings and cracked open all the chests and pots in sight, you should head to the safety of the Underground before night falls to continue your search for useful items and resources.
For a more experienced player, you may wish to consider another option. Cactus/Ebonwood/Shadewood equipment is as effective as Iron gear, and far quicker to obtain, albeit at serious personal risk. Note that the Jungle always generates in a world opposite from the Snow and Dungeon, the Snow often generates close to spawn, and frequently the Corruption/Crimson generate just after or in the Snow biome, especially in small worlds. It is preferable to travel through the Snow as it is faster and safer than the Jungle, and knowing this, one can often quickly reach the Corruption/Crimson. Once there, it is advised to use any buff potions you may have picked up on the way and craft any Wooden Arrows into Flaming Arrows. Nip in, cut one tree, duck out, make an Ebon/Shadewood Sword/Bow, then use the new weapon(s) you’ve made to defend yourself while you chop down a few more trees to make the armor. It only takes a minute or two before you have sufficient equipment to survive every surface biome, as well as the caverns.
It should be emphasized that it is very easy to die while doing this, as it is a gamble and there may not be corruption/crimson at all on one side of the world, and sometimes when the corruption/crimson generates in the snow, there will only be boreal trees around. On the other hand, this strategy frequently does pay off and allows you to quickly obtain superior starting equipment. Even if you don’t find shadewood/ebonwood trees, you can usually at least encounter numerous chests, a desert, or even a pyramid, and collecting cactus is even faster and easier. (Tip: Use a pickaxe to mine the sand under the cactus to conserve time.)
As of the 1.3 update, a great way to get a great starting weapon is to travel to the outer thirds of your map and look for 1 block wide holes in the forest biome. There is a chance you will find the entrance to an Enchanted Sword Shrine, and if you dig down, at the bottom you may find an enchanted sword. You will need climbing gear, blocks or a grappling hook to climb back up. You will also need basic gear to travel to the end of your map, but just be careful and you shouldn't die.
Rain
Monsters: Flying Fish, Umbrella Slime, Rain Coat Zombie
Monster Drops: ![]() Rain Hat,
Rain Hat, ![]() Rain Coat,
Rain Coat, ![]() Umbrella Hat
Umbrella Hat
Notable Resources: ![]() Waterleaf Seeds,
Waterleaf Seeds, ![]() Worm,
Worm, ![]() Goldfish
Goldfish
Chance: There is an 18% chance of rain per full day (once every 5.5 days, on average)
Rain occurs randomly and affects all surface biomes for its duration. Each Rain event begins at a random time and lasts for 24 in-game hours (24 real-world minutes), spanning both day and night portions. When a player is in a Snow biome during Rain, it appears as a Blizzard.
Effects of rain:
Night
Monsters: Zombies, Demon Eyes
Monster Drops: ![]() Shackle,
Shackle, ![]() Lens,
Lens, ![]() Black Lens,
Black Lens, ![]() Zombie Arm
Zombie Arm
Notable Resources: ![]() Fallen Stars
Fallen Stars
Recommended Weaponry: Iron or Ebonwood/Shadewood Broadsword and Bow, Spear, Throwing Knives, Shuriken
Recommended Life:Zombies and Demon Eyes will spawn on the surface at night, regardless of the biome. They are much stronger than monsters from daytime.
It is recommended to stay underground during night time until you are strong enough to easily deal with zombie packs, as there is little to be gained and much to lose for a new character outside after dark. If you do find yourself outside at night, any weapon that can hit multiple times, such as the Spear, Wooden Yoyo, Throwing Knives, and Shurikens, are very useful. Any bow and Flaming or Frostburn Arrows also tend to deal more damage than most other starting weapons. If you're not used to playing sandbox building/mining games, it is easy to forget your greatest ability: the power to move blocks.
If you are busy fighting enemies at night, it may be wise to look for Fallen Stars while you're outside. 3 (5 on Template:Console iconTemplate:Mobile icon) of them can be used to craft a ![]() Mana Crystal, which will benefit you later when you obtain magic weapons.
Mana Crystal, which will benefit you later when you obtain magic weapons.
Going Under
Underground
Monsters: Blue Slime, Red Slime, Yellow Slime, Pinky, Blue Jellyfish, Giant Worm
Monster Drops: ![]() Gel,
Gel, ![]() Glowstick,
Glowstick, ![]() Whoopie Cushion
Whoopie Cushion
Notable Resources: ![]() Copper or
Copper or ![]() Tin,
Tin, ![]() Iron or
Iron or ![]() Lead,
Lead, ![]() Silver or
Silver or ![]() Tungsten,
Tungsten, ![]() Gems,
Gems, ![]() Blinkroot,
Blinkroot, ![]() Crystal Heart
Crystal Heart
Chest Contents: The same as surface chests; pots are more common than on surface
Recommended Equipment: Spear, any Wooden Sword, any Wooden Bow or a Wooden Yoyo
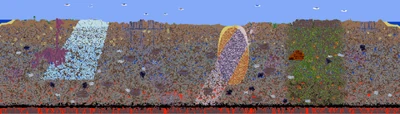
Recommended Life:The underground can be identified by its background (pictured above). It is the first layer below the surface. Copper/Tin and Iron/Lead deposits can be found in this layer as well as Silver/Tungsten and Gold/Platinum, though infrequently.
The short depth of this layer (particularly on small worlds), combined with its limited rewards, means you will probably not be spending too much time here before moving on to the more lucrative Caverns. Copper/Tin is highly abundant, but with the advent of comparable cactus- and wood-based gear which is far quicker to acquire, a once borderline useless ore is now almost completely useless (save for the gem staves).
For a more in-depth guide on mining, see Mining Techniques.
Caverns
Monsters: Cave Bat, Skeleton, Giant Worm, Black Slime, Mother Slime, Baby Slime, Blue Jellyfish, Piranha, Salamander, Crawdad, Giant Shelly, Cochineal Beetle, Undead Miner, Tim, Nymph
Monster Drops: ![]() Gel,
Gel, ![]() Whoopie Cushion,
Whoopie Cushion, ![]() Hook (crafting material),
Hook (crafting material), ![]() Wizard Hat,
Wizard Hat, ![]() Robot Hat,
Robot Hat, ![]() Chain Knife
Chain Knife
Notable Resources: ![]() Copper or
Copper or ![]() Tin,
Tin, ![]() Iron or
Iron or ![]() Lead,
Lead, ![]() Silver or
Silver or ![]() Tungsten,
Tungsten, ![]() Gold or
Gold or ![]() Platinum,
Platinum, ![]() Gems,
Gems, ![]() Silt,
Silt, ![]() Obsidian,
Obsidian, ![]() Glowing Mushrooms,
Glowing Mushrooms, ![]() Crystal Heart
Crystal Heart
Notable Chest Contents: ![]() Band of Regeneration,
Band of Regeneration, ![]() Magic Mirror,
Magic Mirror, ![]() Cloud in a Bottle,
Cloud in a Bottle, ![]() Hermes Boots,
Hermes Boots, ![]() Enchanted Boomerang,
Enchanted Boomerang, ![]() Extractinator,
Extractinator, ![]() Flare Gun,
Flare Gun, ![]() Lava Charm,
Lava Charm, ![]() Shoe Spikes,
Shoe Spikes, ![]() Suspicious Looking Eye
Suspicious Looking Eye
Recommended Weaponry: Iron broadsword or equivalent, Iron bow or equivalent, Wooden Yoyo or any of the surface Chest weapons.
Recommended Life:The Caverns also can be identified by their background (above). It is the second layer below the surface and is by far the largest pre-hardmode biome. The Caverns are divided into two halves. In the top half, lakes of water are found, while in the bottom half, lava is found instead. All pre-hardmode ores except Hellstone can be found frequently in this layer (demonite and crimtane rarely.) Caves of glowing mushrooms can also be encountered.
The Caverns are a massive biome with many useful items and treasures, and as such, players may find themselves spending a lot of time here. Although its monsters can prove quite dangerous for a new adventurer, the greatest threat in this layer may actually be the danger of falling into its vertiginous chasms, frequently with the aid of the ever-helpful bats. In Terraria, it seems the difference between stubbing your toe and breaking both your legs can only be the height of a handful of blocks. Should you find yourself falling to your doom, don’t forget there are a number of items that can break your fall: Cloud in a Bottle’s double jump, grappling any surface, including the ground you’re about to hit, or even an Umbrella. Pools of water (1+ block deep) and cobwebs will also save you if you’re lucky enough to fall into them.
This ever-present danger is closely followed by the devious and near-invisible traps sprinkled generously throughout the inky blackness. A bold, fearless new adventurer skipping heedlessly through the caves for the first time will quickly meet with a boulder landing on their head, or even more hilariously, a landmine powerful enough to bring down a skyscraper. Hopefully, the adventurer will be able to share the developers’ sense of humor when this occurs, particularly if their character was hardcore. Needless to say, tread with extreme caution, and take advantage of the helpful Dangersense Potion if you wish to avoid retrieving your own head. Using generous amounts of light sources is one of the best ways to mitigate both of these dangers. The Flare Gun, Mining Helmet, and Shine Potions can prove useful additions to the usual sources.
Although there are many helpful items to be collected in this layer, probably at the top of the list will be a Grappling Hook and a Magic Mirror. Both of them will make getting around much easier and faster. Fortunately, with the gem hooks, it is trivial to obtain one, and Magic Mirrors are also very common. Besides these two, a player may want to craft a Gem Staff, as even after being nerfed, they still tend to outclass most other weapons at this stage of the game, limited mostly by the number of stars you’ve managed to collect so far.
Note that should you descend too far, you will actually find yourself in the Underworld. This will be marked by a change in music and background to lava walls, and Underworld enemies will start spawning which you probably won’t want to face at this juncture.
A quick note on weapons and armor: at this stage, you have a lot of choices of ore-based weapons and armor that you can craft. It is entirely feasible to be constantly upgrading your weapons if you desire, as they don’t cost much. The Iron Broadsword, for example, only costs 8 iron bars – 24 iron ore – which is about one to three ore veins. Armor is a different question. Because of set bonuses, it is wise to try and complete an armor set rather than mixing and matching different pieces. Because of the way defense works, there isn’t a huge benefit from upgrading from one armor set to the next. The Copper armor set, for example, reduces damage taken by 3, Iron Armor reduces damage by 5, so the difference in damage reduction is only 2, which is barely noticeable. Yet to complete the Iron Armor set requires 225 ore, which represents a significant amount of mining time.
It is therefore recommended to start out with one of the surface Ebonwood/Shadewood or Cactus armors, which can be obtained in under a minute and are as effective as Copper, and then targeting one of Lead/Silver/Tungsten/Gold/Platinum Armors. Lead/Silver/Tungsten is recommended because they are good enough to take on all three of the normal bosses, significantly faster to complete than Gold/Platinum, and allows you to save your Gold/Platinum for weapons/tools.
Building a Base

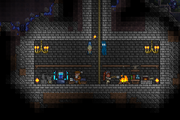
A typical base
Once you’ve filled your pockets with blocks, you may want to consider starting to build a base, as now you have some building materials and money to buy things. A base can take anywhere from a single in-game day to more than an in-game week to complete, depending on the player's tastes. It is not necessary, however, to build the entire base right away. Waiting to build the majority of the base can be advantageous, as it will allow the player to use the large stores of blocks they will end up gathering as a by-product of mining. Regardless of when or what the player builds, it is recommended to build houses for the Guide, Merchant and Nurse, a campfire, and an area for storage and crafting before progressing. It is also wise to create a layout that can be easily added onto later as more NPCs are available and more storage is needed.
For a more in-depth guide on building bases, see Bases.
You should have at least the following in your base before moving on:
- Of course, houses for the Guide, Merchant and Nurse, as well as a valid empty house or two for other NPCs.
- Several organized chests for item storage. You don't want to have a cluttered inventory every time you leave your base.
- A campfire and sunflowers, both of which provide helpful buffs to those nearby. (Sunflowers also block the spread of Corruption and Crimson until hardmode, if you happen to have such biomes near your base.)
- A crafting room, preferably with a chest or two in it to store crafting materials. Eventually, you're going to want a unified place for all your crafting needs. By now, you'll have a Work Bench, a Bottle on that Work Bench, a Chair next to it, a Furnace, and an Iron/Lead Anvil, and probably a Sawmill and a Loom. A Chair and a Table adjacent to each other will serve as a crafting station for Watches. You should also leave some space for later-game crafting stations and more chests, but with just this setup, you'll be able to craft anything up to this point, from swords to robes to potions and building blocks.
Beyond the Forest
Once the player obtains strong enough weapons many mid-tier biomes open up. These biomes contain crafting materials as well as other treasures.
Snow Biome
Monsters: Ice Slime, Zombie Eskimo
Monster Drops: ![]() Gel,
Gel, ![]() Eskimo armor
Eskimo armor
Notable Resources: ![]() Boreal Wood
Boreal Wood, ![]() Shiverthorn
Shiverthorn
Recommended Equipment: Starting equipment
Recommended Life:Your spawning location will often be close to or occasionally even in the Snow biome. The Snow biome will always lie opposite the Jungle in a world, and on the same side as the Dungeon. This biome offers similar challenges and rewards to the Forest biome, along with Boreal Wood and Shiverthorn.
Underground Snow Biome
Monsters: Ice Slime, Ice Bat, Snow Flinx, Spiked Ice Slime, Undead Viking, Cyan Beetle
Monster Drops: ![]() Snowball Launcher,
Snowball Launcher, ![]() Viking Helmet
Viking Helmet
Notable Resources: ![]() Shiverthorn
Shiverthorn
Chest Contents: ![]() Ice Boomerang,
Ice Boomerang, ![]() Ice Blade,
Ice Blade, ![]() Ice Skates,
Ice Skates, ![]() Snowball Cannon,
Snowball Cannon, ![]() Blizzard in a Bottle,
Blizzard in a Bottle, ![]() Flurry Boots,
Flurry Boots, ![]() Fish (item)
Fish (item)
Recommended Weaponry: Ebon/Shadewood or equivalent Sword, Bow and Frostburn Arrows, Gem Staff
Recommended Armor: Cactus, or Ebon or Shadewood
Recommended Life:The Underground Snow can be reached from the surface Snow, or from the Caverns, although sometimes there is no natural entrance from one or both. The Underground Snow ends where the lava layer begins. It is somewhat more difficult than the Caverns. Though there may not be as large a quantity of ore or gems in this biome, it is still worth exploring for its unique chest contents. Note that Ice Chests are less common than Gold Chests and it can take a lot of exploring to find all the Ice Chest drops (it may even require exploring multiple worlds). However, you should be wary of the thin ice pockets scattered throughout the biome to avoid an untimely fall to your death.
Desert Biome
Monsters: Vulture, Antlion, Antlion Swarmer, Antlion Charger, Sand Slime
Monster Drops: ![]() Antlion Mandible,
Antlion Mandible, ![]() Gel
Gel
Notable Resources: ![]() Cactus,
Cactus, ![]() Waterleaf,
Waterleaf, ![]() Pink Prickly Pear
Pink Prickly Pear
Recommended Weaponry: Wooden Sword, Spear, Any thrown weapon (![]()
![]()
![]() )
)
The monsters in the desert are in the low tier and can be easily dealt with using ranged weapons, although Antlion Swarmers and Vultures may present a moderate challenge. If you visit the desert very early on you can craft equipment from cactus, which is slightly stronger than wooden equipment.
One of your deserts will contain an entrance to the Underground Desert. If you're standing on the edge of this entrance, a monster may cause you to fall to your death below, so be careful.
If you are lucky, your desert may contain a Pyramid, either sticking slightly out of the sand or buried just underneath. Digging down through the Pyramid's sandstone walls will bring you to a chamber with a chest which may contain a ![]() Flying Carpet or
Flying Carpet or ![]() Sandstorm in a Bottle, both very useful accessories, and you're guaranteed to gain a least a few gold coins from the chest, money sacks, and pots in the temple chamber.
Sandstorm in a Bottle, both very useful accessories, and you're guaranteed to gain a least a few gold coins from the chest, money sacks, and pots in the temple chamber.
On the other hand, if you are unlucky enough to arrive during a Sandstorm with insufficient gear, it may be best to explore the desert later.
Underground Desert
Monsters: Antlion, Antlion Swarmer, Antlion Charger, Tomb Crawler
Monster Drops: ![]() Antlion Mandible,
Antlion Mandible, ![]() Mandible Blade
Mandible Blade
Notable Resources: ![]() Desert Fossil
Desert Fossil
Recommended Weaponry: Silver Broadsword or better, Spear, Rally
Recommended Armor: Iron or better
Recommended Life:The Underground Desert is about as difficult as the Underground Snow biome and is a good source of treasure otherwise found in the Caverns. However, until you defeat the Eater of Worlds or Brain of Cthulhu, or obtain a Reaver Shark, you cannot mine or bomb the Desert Fossils, but once you can mine them, put them through an Extractinator to get ![]() Sturdy Fossils
Sturdy Fossils, which are used to craft consumable throwing weapons and a set of armor that will skyrocket you through easy mode.
Jungle Biome
Monsters: Piranha, Snatcher, Jungle Bat, Jungle Slime, Doctor Bones (night only)
Monster Drops: ![]() Gel,
Gel, ![]() Hook (crafting material),
Hook (crafting material), ![]() Robot Hat,
Robot Hat, ![]() Archaeologist's Hat
Archaeologist's Hat
Notable Resources: ![]() Moonglow,
Moonglow, ![]() Jungle Rose,
Jungle Rose, ![]() Jungle Grass Seeds
Jungle Grass Seeds
Recommended Weaponry: Ebon or Shadewood Sword, Bow, Gem Staff
Recommended Armor: Cactus, or Ebon or Shadewood
Recommended Life:The jungle is one of the more difficult surface biomes. The Underground Jungle should not be attempted early on.
Corruption Biome
Monsters: Eater of Souls, Devourer
Monster Drops: ![]() Rotten Chunk,
Rotten Chunk, ![]() Worm Tooth
Worm Tooth
Notable Resources: ![]() Ebonwood,
Ebonwood, ![]() Vile Mushroom,
Vile Mushroom, ![]() Deathweed,
Deathweed, ![]() Demonite
Demonite
Shadow Orb Contents: ![]() Ball O' Hurt,
Ball O' Hurt, ![]() Band of Starpower,
Band of Starpower, ![]() Musket,
Musket, ![]() Shadow Orb,
Shadow Orb, ![]() Vilethorn
Vilethorn
Recommended Weaponry: Ebonwood Sword, Bow, Rally, Gem Staff
Recommended Armor: Ebonwood or Cactus
Recommended Life:The Corruption can be a challenging biome for players with basic equipment. Demonite is found in small deposits in this biome, though a Gold Pickaxe is needed to mine it. Ebonstone can only be mined with a Demonite Pickaxe, which can only be obtained after defeating Eater of Worlds, but you can use ![]() Purification Powder,
Purification Powder, ![]() Bombs, and/or
Bombs, and/or ![]() Dynamite to destroy Ebonstone before you’ve defeated Eater of Worlds. It's also possible to obtain Unholy Arrows here by killing Devourers and combining their Worm Teeth with regular arrows.
Dynamite to destroy Ebonstone before you’ve defeated Eater of Worlds. It's also possible to obtain Unholy Arrows here by killing Devourers and combining their Worm Teeth with regular arrows.
Shadow Orbs are also found encased in ebonstone at the bottom of the chasms. Breaking them with a hammer (or bombs) can yield powerful items. You may be tempted to ninja the Shadow Orbs early on, but you should also be prepared to deal with the events that will be triggered (see the Eater of Worlds section for more details.) Breaking three Shadow Orbs will result in the Eater of Worlds being summoned.
You may wish to cover the chasms with blocks, which will seal Eaters that spawn inside the chasms and prevent them knocking you down to your death. Rope is also very useful here to ascend and descend the chasms rapidly and safely.
Crimson Biome
Monsters: Crimera, Face Monster, Blood Crawler, Blood Feeder
Monster Drops: ![]() Vertebrae
Vertebrae
Notable Resources: ![]() Shadewood,
Shadewood, ![]() Vicious Mushroom
Vicious Mushroom, ![]() Deathweed,
Deathweed, ![]() Crimtane Ore
Crimtane Ore
Crimson Heart Contents: ![]() The Undertaker,
The Undertaker,  The Rotted Fork,
 ![]() Crimson Rod,
Crimson Rod, ![]() Panic Necklace,
Panic Necklace, ![]() Crimson Heart
Crimson Heart
Recommended Weaponry: Shadewood Sword, Bow, Rally, Gem Staff
Recommended Armor: Shadewood or Cactus
Recommended Life:Sometimes the Crimson will replace the Corruption in your world. Most of what’s written in the Corruption section can also be applied to the Crimson. The Crimson is an upgrade to the Corruption in a similar way to how Lead is an upgrade to Iron; in general, the stats on crimson items are slightly better. However, in this case, it is not strictly better, as the Corruption has some very useful items like the Vilethorn, Worm Teeth (for Unholy Arrows), and Band of Starpower that have no counterpart in the Crimson.
Crimson monsters are perhaps more difficult than Corrupt ones. Cave generation is also different: instead of deep shafts, it contains one big neuron-shaped cave that you can walk down more easily. Crimtane Ore replaces Demonite Ore and Crimson Hearts replace Shadow Orbs. The Brain of Cthulhu boss is the Crimson counterpart to Eater of Worlds, though Eater of Worlds is slightly easier.
Ocean Biome
Monsters: Shark, Pink Jellyfish, Crab, Squid, Sea Snail
Monster Drops: ![]() Glowstick,
Glowstick, ![]() Shark Fin,
Shark Fin, ![]() Diving Helmet,
Diving Helmet, ![]() Jellyfish Necklace,
Jellyfish Necklace, ![]() Black Ink
Black Ink, ![]() Purple Mucos
Purple Mucos
Notable Resources: ![]() Palm Wood
Palm Wood, ![]() Coral,
Coral,  Reaver Shark
Chest Contents: ![]() Breathing Reed,
Breathing Reed, ![]() Flipper,
Flipper, ![]() Trident,
Trident,  Beach Ball,
 ![]() Water Walking Boots
Water Walking Boots
Recommended Weaponry: Shadewood Sword, Bow, Rally, Gem Staff
Recommended Armor: Shadewood or Cactus
Recommended Life:Oceans are always found at the edge of the world, usually next to beaches containing Palm Trees and decorative seashells and starfish. Water Chests are found at the very bottom of the ocean typically in the deepest parts. New characters may have problems working in this biome because of sharks and a lack of air supply. ![]() Gills Potions can help in this regard.
Gills Potions can help in this regard.
Even without underwater breathing aids, you can loot the ocean chests by quickly running along the bottom and then teleporting home with the Magic Mirror before you drown (this can be made easier with Hermes Boots, Swiftness Potions, and Water Walking Potions). If you do this quickly, no sharks should bother you.
If the platform permits, you will definitely want to go Fishing in this biome. The varied loot can provide for a bit of money, and if the player catches a Reaver Shark, he/she won't have to get a new pickaxe until Hardmode.
Floating Island
Monsters: Harpy
Monster Drops: ![]() Feather,
Feather, ![]() Giant Harpy Feather
Giant Harpy Feather
Notable Resources: ![]() Silver or
Silver or ![]() Tungsten,
Tungsten, ![]() Gold or
Gold or ![]() Platinum
Platinum
Chest Contents: ![]() Shiny Red Balloon,
Shiny Red Balloon, ![]() Starfury,
Starfury, ![]() Lucky Horseshoe
Lucky Horseshoe
Recommended Weaponry: ![]() Space Gun or other gun, or Ruby/Diamond Staff
Space Gun or other gun, or Ruby/Diamond Staff
Recommended Armor: Silver minimum, better recommended
Recommended Equipment: Gravitation Potion, Featherfall Potion, other buff potions
Recommended Life:Floating islands and Sky Lakes are typically found around 475ft on small maps, at 500-700ft on medium maps, and at 600-1000ft on large maps. A small map generally has 3 floating islands and a sky lake, though sometimes 2 islands; medium maps can have up to 4 islands and 2 lakes; large maps up to 6 islands and 2 or 3 lakes. Each island contains a Skyware Chest, along with ore deposits and unique blocks and skyware furniture. Sky Lakes have a chance of containing Water Chests.
It can be difficult to find, reach, and loot floating islands. Although there are many ways to approach this problem, the quickest and most straightforward is to use gravitation potions found in underground chests to fly across the map at the appropriate height (a Depth Meter can help if you are unsure.) Only two are needed to fly across and loot an entire small world. Featherfall Potions will make flying quite a bit easier to control and help prevent you turning into a splat on the ground should you impact at too high a velocity. (It should also be mentioned that you should set out early in the day to maintain good visibility of Harpies.)
Loiter at cloud level, and you will soon be surrounded by flocks of harpies, making floating islands a harrowing ordeal even with decent equipment. The key is to use as many speed-boosting items as possible -- Hermes Boots, Swiftness Potions, anything that gives Well Fed -- and be continually moving forward, only quickly pausing to loot, to minimize their harassment. If you do so, you really don’t need good equipment at all.
If you do fight Harpies, because of their attacks from distance and erratic flight pattern, it can be quite difficult to hit them, and it’s advisable to use a weapon with a long range and high velocity: the Space Gun (especially with Meteor Armor) is perfect for this job, but another Gun will do. If for some reason you plan to revisit a floating island or sky lake, you may wish to drop a line of Rope.
It’s recommended to loot the floating islands as soon as you get Gravitation Potions, as it is fast and all the loot is highly useful -- removing falling damage eliminates a huge pain, and Starfury is a very strong weapon at this stage, making cave exploration immeasurably easier.
As you continue your exploration of the surface, you should also expect to encounter this event:
Blood Moon
Monsters: Crimtane Bunny/Corrupt Bunny, Crimtane Goldfish/Corrupt Goldfish, Crimtane Penguin/Corrupt Penguin, The Groom, The Bride, Blood Zombie, Drippler
Monster Drops: ![]() Bunny Hood,
Bunny Hood, ![]() Top Hat,
Top Hat, ![]() Money Trough
Money Trough, ![]() Shark Tooth Necklace
Shark Tooth Necklace, ![]() Wedding Dress
Wedding Dress and ![]() Wedding Veil
Wedding Veil
Notable Resources: ![]() Deathweed Seeds
Deathweed Seeds
Chance: 1/9
During a Blood Moon bunnies and goldfish will turn hostile, and the spawn rate of all monsters on the surface will increase dramatically. Additionally, zombies will be able to spawn near NPCs and force doors open (you can prevent this by blocking the doors with a block or platform on the inside). In addition, Deathweed will bloom, and some NPCs will also sell special wares. If you do not wish to fight in a Blood Moon, you should probably seek shelter underground where you will be beyond its effects. But with increased danger comes increased reward. Killing Blood Zombies and Dripplers has a chance to yield the Money Trough, which is essentially a mobile Piggy Bank, and the Shark Tooth Necklace, which causes your attacks to act as if all monsters' defence has been reduced by 5, making fast-firing weapons such as the Minishark and Water Bolt more effective against tough enemies.
The Bosses: Taking On The Big Three
Once you’ve survived the first couple nights and started work on a base, you should begin preparations for the upcoming boss battles, as even if you do not wish to go looking for them, they will come looking for you.

King Slime
Life: 2000 / 2800
Damage: 40 / 67
Defense: 10
Minions: Blue Slime
Drops: ![]() Lesser Healing Potion,
Lesser Healing Potion, ![]() Ninja Clothes,
Ninja Clothes, ![]() Slime Gun
Slime Gun, ![]() Slime Hook
Slime Hook, ![]() Solidifier,
Solidifier, ![]() Slimy Saddle
Slimy Saddle (rare) ![]() Royal Gel
Royal Gel (expert)
King Slime is an entirely optional but fun mini-boss, although the word “mini” in this case seems grossly insufficient to describe this appropriately named King-sized slime. None of its drops are necessary for game advancement, or of much use at all, except for the Slime Hook. They’re mostly just for amusement, much like this boss.
King Slime can spawn rarely in Forests outside the middle third of the world, or by using a ![]() Slime Crown. As with all monsters that can spawn naturally, the King Slime has a better chance of spawning while standing near a placed Water Candle or under the effects of a Battle Potion. It is extremely unlikely you will ever come across King Slime without planning to. King Slime is a good challenge for a beginning player and can be easily defeated by tactical use of terrain.
Slime Crown. As with all monsters that can spawn naturally, the King Slime has a better chance of spawning while standing near a placed Water Candle or under the effects of a Battle Potion. It is extremely unlikely you will ever come across King Slime without planning to. King Slime is a good challenge for a beginning player and can be easily defeated by tactical use of terrain.
Still, savvy players may want to defeat King Slime for the chance of getting a good Slime Hook, as it's better than any hook obtainable up to this point, allowing you to grapple to three spots.
For more information, refer to Guide:King Slime strategies
Eye of Cthulhu
Eye of Cthulhu
Life: 2800
Damage: 15 (First Stage), 23 (Second Stage)
Defense: 12 (First Stage), 0 (Second Stage)
Minions: Servant of Cthulhu (8 Life, 12 Damage, 0 Defense)
Drops: ![]() Lesser Healing Potions,
Lesser Healing Potions, ![]() Unholy Arrows,
Unholy Arrows, ![]() Demonite or
Demonite or ![]() Crimtane Ore,
Crimtane Ore, ![]() Corrupt or
Corrupt or ![]() Crimson Seeds
Crimson Seeds, ![]() Shield of Cthulhu
Shield of Cthulhu (expert)
Recommended Weaponry: Gem Staff, Gold/Platinum Bow with unholy or frostburn arrows, Shurikens, Poisoned Knives
Recommended Armor: Silver or Tungsten
Recommended Buffs: ![]() Ironskin Potion,
Ironskin Potion, ![]() Regeneration Potion,
Regeneration Potion, ![]() Well Fed,
Well Fed, ![]() Cozy Fire
Cozy Fire
The Eye of Cthulhu has a 1:3 chance of spawning each night if the player meets all three of the following requirements:
- Eye of Cthulhu has not been defeated in the current world
- At least one player in the world has 10 or more hearts (200 HP) and 10 or more defense
- Three NPCs are present in the world
Shortly before Eye of Cthulhu appears, the player will receive the message, "You feel an evil presence watching you." Leaving the game and reopening it at this point will cancel the fight, as many players prefer to fight Eye of Cthulhu on their own terms by using a ![]() Suspicious Looking Eye to summon it. The Eye must be defeated by dawn.
Suspicious Looking Eye to summon it. The Eye must be defeated by dawn.
Eye of Cthulhu looks like an enormous Demon Eye. Like most bosses, it travels through blocks. The Eye has two forms. During the first, he spawns Servants of Cthulhu while floating around the player, which drop hearts and stars on death. When the Eye’s health falls below half (1400), it transforms into its second form, which charges the player more aggressively, no longer spawns Servants, and has lowered defense.
Ranged/magic weapons are recommended for this fight, especially piercing weapons as they will hit multiple times per attack. Using a flat, wide open space for an arena, such as the one around your original spawn point, will also make it easier to dodge the Eye’s attacks.This boss is generally the first boss players face.
For more information, refer to Guide:Eye of Cthulhu strategies
Eater of Worlds / Brain of Cthulhu
After the Eye of Cthulhu is defeated, you should do the following:
- Be sure the Dryad has a home. She sells Purification Powder, a less explosive option for getting to those Shadow Orbs and Crimson Hearts, and planters, a more convenient way to grow your alchemy herbs.
- Make sure to have at least 10 (preferably 12) valid NPC houses and be sure you can access them without having to go all the way across the map (this will be important in hardmode).
- If you have Crimson in your world and don't have anything better than a Platinum Broadsword, Platinum Bow or Rally yet, craft a Blood Butcherer from the Eye's drops.
- Start on your herb farm. Potions will be immeasurably helpful throughout the rest of the game.
- Build a chest room. It's not a bad idea to have plenty of storage space to put away items you'll find later on.
Then head to the Underground Crimson or Corruption to smash your first Crimson Heart or Shadow Orb (don’t forget the hammer). Smashing your first heart or orb allows two events to occur in short order:
A Meteorite
Monsters: Meteor Head
Notable Resources: ![]() Meteorite,
Meteorite, ![]() Meteor Head Banner
Meteor Head Banner
Recommended Weaponry: Vilethorn
Recommended Armor: Silver/Tungsten
Recommended Equipment: ![]() Dynamite,
Dynamite, ![]() Sticky Bombs, Gold or Platinum Pickaxe, buff potions
Sticky Bombs, Gold or Platinum Pickaxe, buff potions
Chance: 50% on breaking a Shadow Orb or Crimson Heart
Smashing an orb/heart will give a 50% chance for a meteorite to land the next midnight; smashing additional orb/hearts after the first one on the same day will not increase your chance of a meteorite landing. However, if it is between midnight and dawn (04:30), the meteorite “roll” will occur immediately. Therefore if you wish to maximize your chances of more meteorites landing, you should only smash orbs/hearts between midnight and dawn, or wait until midnight has passed to smash an additional orb/heart.
Meteorite mining can be a very tricky business. At this stage of the game you don’t have great equipment, but while trying to mine, you will be constantly harassed by spawning meteor heads, and touching any part of what you are trying to mine will burn you. Although an Obsidian Skull can prevent this damage, you can’t obtain one until after Eater of Worlds / Brain of Cthulhu has been defeated. Mining with a pickaxe is, therefore, slow, tedious, and frustrating.
The answer is to blow things up. Dynamite is perfect with a large blast radius. You may wish to build a wood platform out over the middle of the crater to make it easier to get a perfect placement as well as allowing you to fire through at meteor heads coming from below. You can then quickly clean up remaining sections with sticky bombs. Once there are fewer than 50 meteorite blocks in the area, there will cease to be a meteorite biome and no more meteor heads will spawn.
One note: the Vilethorn is a weapon tailor-made to deal with meteor heads, as it one-shots them, knocks them back from hitting you, and also goes through blocks like them. Unfortunately, it can only be obtained on Corruption worlds.
In case you’re wondering if it’s worth the hassle to mine meteorite, the answer is an overwhelming yes! Once you get the Space Gun and Meteor armor combo, you can basically just click on anything to kill it. This combination is good enough to see you through the end of easymode if you desire.
As of version 1.3.0.1, the player can kill off 50 meteor heads to obtain their banner, which makes it easier to deal with meteorite biomes- though it may be tedious, it is a good idea to obtain one early.


Goblin Army
Monsters: Goblin Peon, Goblin Thief, Goblin Warrior, Goblin Archer, Goblin Sorcerer
Monster Drops: ![]() Spiky Ball,
Spiky Ball, ![]() Harpoon
Harpoon
Recommended Weaponry: ![]() Space Gun, Platinum/Demon/Tendon Bow with Unholy/Jester’s Arrows, Ruby/Diamond Staff,
Space Gun, Platinum/Demon/Tendon Bow with Unholy/Jester’s Arrows, Ruby/Diamond Staff, ![]() Grenades,
Grenades, ![]() Molotov Cocktail
Molotov Cocktails, ![]() Spiky Balls
Spiky Balls
Recommended Armor: Silver or better
Recommended Buffs: ![]() Ironskin Potion,
Ironskin Potion, ![]() Regeneration Potion,
Regeneration Potion, ![]() Thorns Potion,
Thorns Potion, ![]() Archery Potion (if applicable),
Archery Potion (if applicable), ![]() Well Fed
Well Fed
Criteria: Breaking a Shadow Orb or Crimson Heart, 10 hearts
Chance: 1/3 for first invasion, 1/30 subsequently
The Goblin Army will invade at dawn, centered on the map’s original spawn point. You must kill 120 goblins (plus 40 per additional 200+ HP player) to defeat the invasion. Of the goblin types, the sorcerer is the most annoying due to its ranged, block-penetrating attacks and ability to teleport. The Goblin Army can be summoned with a Goblin Battle Standard.
As usual, the best arena is a perfectly flat, long space, such as the one conveniently found around your original spawn point. The ideal weapons are ones that travel in long, straight lines and pierce multiple enemies; as well as ones that deal AoE (area of effect) damage. Again, conveniently, the spiky balls dropped by goblins are a very effective weapon against them.
Every third Orb or Heart you smash in the world will spawn either Eater of Worlds or Brain of Cthulhu respectively:
Eater of Worlds
Life: 65 (Head), 150 (Body), 220 (Tail)
Damage: 22 (Head), 13 (Body), 11 (Tail)
Defense: 2 (Head), 4 (Body), 8 (Tail)
Drops: ![]() Demonite Ore,
Demonite Ore, ![]() Shadow Scale,
Shadow Scale, ![]() Worm Scarf
Worm Scarf (expert)
Recommended Weaponry: ![]() Starfury,
Starfury, ![]() Rockfish,
Rockfish, ![]() Phaseblade, or any melee weapon
Phaseblade, or any melee weapon
Recommended Armor: Silver
Recommended Buffs: ![]() Ironskin Potion,
Ironskin Potion, ![]() Hunter Potion,
Hunter Potion, ![]() Well Fed,
Well Fed, ![]() Tipsy
Tipsy
Eater of Worlds is a worm-type boss with 50 segments, each with their own hp. When a segment in the middle is destroyed, the two severed parts will each become new worms, each with their own head and tail. This boss must be fought in the Corruption and will disappear if you leave the Corruption at any point during the fight.
You will not face an easier boss in Terraria than EoW. You could probably beat it with a rusty shortsword if you have enough patience. EoW is probably the only boss against which melee is not only viable but is the best option. The reason for this is when you swing your melee weapon as the worm glides past, the worm is running itself into your swing and damaging many segments per swing. Ranged/magic weapons at this point usually only hit 2-4 times per shot, generally, have lower DPS, and consume limited ammo or mana.
As you’ll notice from the stats above, the head does the most damage but has the least health. For this reason, you should aim for the head while trying to avoid it hitting you. Once you’ve worn down the overall HP of the body by some, you will eventually sever the worm in two. You may notice the new worm takes a second to get going, and there will be a new head just sitting there -- right under your blade. If you have a high enough DPS in your swing, you can one or two-shot the already damaged head before it even gets going, then, kill the next head on the chopping block, then the next, etc. Employing this strategy will turn this fight from a mismatch into a literal execution.
In Expert Mode, you may not want to take the EoW aboveground because its damaging ranged attacks will no longer be frequently blocked if you do so.
For more information, refer to Guide:Eater of Worlds strategies.
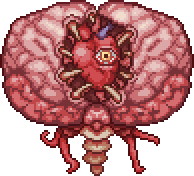
Brain of Cthulhu
Life: 1000 (body), 100 (creeper)
Damage: 30 (body), 20 (creeper)
Defense: 14 (body), 10 (creeper)
Drops: ![]() Crimtane Ore,
Crimtane Ore, ![]() Tissue Sample,
Tissue Sample, ![]() Brain of Confusion
Brain of Confusion (expert)
Recommended Weaponry: Space Gun, The Undertaker, Platinum or Tendon Bow, Ruby/Diamond Staff
Recommended Armor: Silver or Meteor
Recommended Buffs: ![]() Ironskin Potion,
Ironskin Potion, ![]() Regeneration Potion,
Regeneration Potion, ![]() Swiftness Potion,
Swiftness Potion, ![]() Well Fed,
Well Fed, ![]() Campfire
Campfire
The Brain of Cthulhu is a boss that teleports and has two stages. In the first stage, it is invincible and surrounded by 20-30 Creepers. You must kill all the creepers before you can damage the Brain. In the second stage, you fight the Brain directly as it tries to charge you.
As with most bosses, attacking from distance is advised. You may elect to build an arena with levels of platforms in the central cavern where you will likely be fighting. It is not totally necessary but will improve mobility and make it easier to dodge attacks. Against the creepers in the first stage, it can be quite effective to use AoE weapons like Molotov cocktails or grenades, as well as risky in the case of the latter. Tossing grenades straight up in the air towards creepers flinging themselves at you can result in you damaging yourself, so a safer alternative would be to instead go for a broadsword when attacking Creepers.
For more information, refer to Guide:Brain of Cthulhu strategies
Skeletron
Skeletron
Life: 4400 (Head), 600 (Hand)
Damage: 32 (Head), 32 (Hand)
Defense: 10 (Head), 10 (Hand)
Drops: ![]() Book of Skulls (uncommon),
Book of Skulls (uncommon), ![]() Skeletron Hand (uncommon)
Skeletron Hand (uncommon) ![]() Bone Glove
Bone Glove (expert)
Recommended Armor: Shadow/Crimson, Jungle, or Meteor
Recommended Life:To gain entrance to the dungeon, Skeletron must be defeated. To summon Skeletron, talk to the Old Man in front of the dungeon at night.
Your approach for this fight should be in line with most other boss fights. Once again, ranged and magic weapons that pierce are the preferred option, along with all the usual buffs and healing (and possibly mana) potions. The roof of the Dungeon can serve as a perfectly acceptable arena. Skeletron has a similar difficulty to the other normal bosses compared to your current gear. As usual, aim for the head, especially when it does its slow spinning attack when its defense goes to zero.
For more information, refer to Guide:Skeletron strategies
The Late Pre-Hardmode Biomes
The three late easymode biomes — the Underground Jungle, Dungeon, and Underworld — are all of the roughly similar difficulty and can be done in any order or concurrently.
The Underground Jungle
Underground Jungle Biome
Monsters: Hornet, Man Eater, Jungle Bat, Piranha, Spiked Jungle Slime, Lac Beetle, Doctor Bones
Monster Drops: ![]() Stinger,
Stinger, ![]() Vine,
Vine, ![]() Hook,
Hook, ![]() Bezoar,
Bezoar, ![]() Violet Husk
Violet Husk, ![]() Ancient Cobalt Armor,
Ancient Cobalt Armor, ![]() Archaeologist's Hat
Archaeologist's Hat
Notable Resources: ![]() Moonglow,
Moonglow, ![]() Jungle Spores,
Jungle Spores, ![]() Jungle Rose,
Jungle Rose, ![]() Nature's Gift,
Nature's Gift, ![]() Sky Blue Flower,
Sky Blue Flower, ![]() Rich Mahogany
Rich Mahogany
Chest Contents:
- Weapons: Boomstick, Staff of Regrowth
- Accessories: Anklet of the Wind, Feral Claws, Flower Boots
- Other: Fiberglass Fishing Pole, Seaweed, Living Mahogany Wand
,Rich Mahogany Leaf Wand,Honey Dispenser

Recommended Equipment: Shadow or Crimson, Meteor, Necro
Recommended Life:The Underground Jungle lies below the surface Jungle, beginning at variable depths, and typically extends right to the Underworld. It also contains multiple Bee Hives and a Jungle Temple, which can not be entered until hardmode (after defeating the Plantera boss.)
The primary threats in the Underground Jungle are the Hornet, which flies, attacks from range, and generally keeps its distance, and the Spiked Jungle Slime, which can launch venomous spikes at you from a surprisingly far distance. For this reason, it can be quite dangerous to use melee weapons on them, which is why ranged/magic weapons are recommended in the UJ, preferably with high velocities, such as the Space Gun. The Vilethorn is also outstanding if available. You may note that there are bigger, more open spaces than in the Caverns. This can lead to high spawn rates and swarms of hornets attacking from all directions which can be very dangerous. If you have low-tier gear when first exploring the UJ, it is safer to stay to the side tunnels and the edges of the large caves until you've acquired better gear and more life crystals.
The UJ also seems to have more and bigger bodies of water than other biomes, and accordingly, it can be helpful to have diving equipment like the Diving Helmet, Flipper and Gills Potions.
Be on the lookout for the following loot and materials in the underground jungle:
- Staff of Regrowth: This drastically improves the yield of your alchemy garden and makes it far easier to harvest (only on PC though).
- Feral Claws: These will increase your melee speed, and therefore, your mining speed, and can prove very helpful later on in hardmode.
- Anklet of the Wind: This greatly increases your movement speed without having to be charged up, unlike Hermes/Flurry/Sailfish Boots, and can also be tinkered with Spectre Boots and an Aglet to make Lightning Boots, which are highly recommended to have before hardmode.
- Bezoar: Immunity to poison is nothing to sneeze at whilst you're in the underground jungle, and this accessory is very helpful when coming up against Queen Bee. This accessory is also needed to make the Ankh Charm later on in hardmode.
- Honey: This will give you a healing buff upon touching it and is therefore very useful in boss arenas. Consider bringing Buckets along to pick it up.
- Stingers and Jungle Spores: These can be used to craft better gear that's useful against some of the upcoming challenges.
- Vines: These can be used to craft an Ivy Whip, which allows you to grapple to three different spots, unlike any other hook in easymode (except the Slime Hook), and is still very useful well into hardmode.
- Flower Boots: These are useful for creating farms for harvesting hay, critters, and strange plants (note the last do not grow within 240 blocks(480 feet) of one another.
Queen Bee
Life: 3400
Damage: 30
Defense: 8
Drops: ![]() Bottled Honey,
Bottled Honey, ![]() Beenade,
Beenade, ![]() Bee Gun,
Bee Gun, ![]() Bee Keeper,
Bee Keeper, ![]() The Bee's Knees
The Bee's Knees, ![]() Honey Comb,
Honey Comb, ![]() Hive Wand,
Hive Wand, ![]() Bee costume,
Bee costume, ![]() Nectar,
Nectar, ![]() Honeyed Goggles
Honeyed Goggles, ![]() Bee Wax
Bee Wax
Recommended Equipment: Meteor, Shadow (with Thorn Chakram), Crimson, Jungle, or Necro
Recommended Life:The Queen Bee boss spawns when you break the Larva in a Hive, or by using an Abeemination in the Jungle. She has three attack patterns:
- Charging horizontally.
- Shooting poisonous stingers while hovering and swooping.
- Hovering while shooting bees.
Queen Bee is not a terribly difficult fight at this stage in the game. Her charge attack is predictable and easy to dodge, and you can stand in the honey in the hive for a big healing boost (it lasts 30 seconds after leaving the honey). It is probably wise, however, to build a small platform of blocks in the hive for the fight so that you don't get stuck in the honey.
Unsurprisingly, many of the Queen Bee's drops may be better than what you already have. Even if they aren't, farming Queen Bee is a good source of income before hardmode (and you will need the money sooner or later anyway). Plus, the Bee mount is the earliest mounts that can fly, although it's slow on land and hates water.
The Dungeon
Dungeon Biome
Monsters: Angry Bones, Cursed Skull, Dark Caster, Dungeon Slime, Blazing Wheel, Spike Ball
Monster Drops: ![]() Bone,
Bone, ![]() Golden Key,
Golden Key, ![]() Bone Wand,
Bone Wand, ![]() Clothier Voodoo Doll,
Clothier Voodoo Doll, ![]() Ancient Necro Helmet,
Ancient Necro Helmet, ![]() Nazar
Nazar
Notable Resources: ![]() Water Bolt,
Water Bolt, ![]() Water Candle,
Water Candle, ![]() Switch, various Dungeon Furniture
Switch, various Dungeon Furniture
Chest Contents:
- Weapons: Aqua Scepter, Blue Moon, Handgun, Magic Missile, Muramasa, Valor
- Accessories: Cobalt Shield
- Other: Shadow Key, Bone Welder

Recommended Weapons: Space Gun, Vilethorn, Jester's Arrows, Grenades, Molotov Cocktails, Spiky Balls
Recommended Armor: Shadow, Crimson, or Meteor
Recommended Equipment: Ivy Whip, Lucky Horseshoe, Rocket or Spectre Boots, buff potions
Recommended Life:The Dungeon can be found near the right or left edge of the map, always on the opposite side of the Jungle and on the same side as the Snow biome. Note that attempting to enter the Dungeon before Skeletron is defeated will lead to an unpleasant surprise.
The Dungeon is arguably the hardest biome before hardmode. With its extremely high spawn rates, the abundance of dangerous and invincible traps, and general inability to use terrain as cover, even experienced players can be overwhelmed. The key is to take your time and don't rush into a lethal situation. The Cobalt Shield, once you acquire it, can be quite helpful for preventing one hit from knocking you into a deadly pit of monsters and spikes. If you find yourself overwhelmed by enemies, taking down every water candle you see will significantly reduce spawn rates (you may even want to use a Calming Potion). Certain room geometries can lead to a continuous stream of enemies spawning, generally rooms with large sections offscreen and multiple hallways leading into them. In these cases, it may be wise to move on as quickly as possible.
Since most of the enemies in the Dungeon walk and don't fly, the Ivy Whip is invaluable to avoid enemies as well as traps. Sticky Bombs are helpful in disarming particularly obnoxious Spikes. Finally, the best weapons are obviously those that can damage many enemies at once, eg the Space Gun, Vilethorn, Jester's Arrows, Grenades, Molotov Cocktails, Spiky Balls, etc.
Make sure to get the following loot before leaving the Dungeon:
- Cobalt Shield: Protection against knockback will be invaluable in the Underground Jungle and Underworld, and later on in hardmode. The Cobalt Shield can also be tinkered with an Obsidian Skull to make an Obsidian Shield, which will prove very valuable in the Underworld as well.
- Muramasa: This is one of the swords used to make the Night's Edge, which is useful to have before hard mode.
Water Bolt book on a shelf
- Water Bolt: This weapon's piercing and bouncing projectiles will utterly wreck any enemy in the Dungeon, Jungle, and Underworld. However, it won't be as useful in hardmode because enemies will then have a much higher defense.
- Valor: Like all yoyos, this can help greatly in tight situations.
- Handgun: This weapon is a strong, reliable ranged weapon, provided you can click fast enough. Not very useful in the dungeon, due to its lack of piercing and stun-locking. Can be upgraded into the much more powerful Phoenix Blaster.
- Shadow Key: This item can unlock any Shadow Chest in the Underworld. These chests contain many weapons which are unrivaled in power in easy mode and often still remain decent in early hardmode.
- Nazar: Although not very useful outside the Dungeon, this accessory is needed to craft the Ankh Charm. It is highly recommended to farm for this accessory before unlocking the hardmode dungeon, as the Cursed Skulls which drop it will become much rarer then.
.png)
The Underworld
The Underworld
Monsters: Lava Slime, Hellbat, Fire Imp, Demon, Voodoo Demon, Bone Serpent
Monster Drops: ![]() Demon Scythe,
Demon Scythe, ![]() Obsidian Rose,
Obsidian Rose, ![]() Guide Voodoo Doll,
Guide Voodoo Doll, ![]() Plumber's Hat,
Plumber's Hat, ![]() Magma Stone.
Magma Stone. ![]() Cascade
Cascade
Notable Resources: ![]() Hellstone,
Hellstone, ![]() Fireblossom,
Fireblossom, ![]() Hellforge,
Hellforge, ![]() Demon Torch, various Obsidian furniture
Demon Torch, various Obsidian furniture
Chest Contents:  Dark Lance,
 ![]() Flower of Fire,
Flower of Fire, ![]() Sunfury,
Sunfury, ![]() Flamelash,
Flamelash, ![]() Hellwing Bow
Hellwing Bow
Recommended Armor: Shadow, Crimson, Meteor, Jungle, or Necro
Recommended Equipment: ![]() Lava Waders or
Lava Waders or ![]() Lava Charm,
Lava Charm, ![]() Water Walking Potion,
Water Walking Potion, ![]() Obsidian Skin Potion,
Obsidian Skin Potion, ![]() Obsidian Skull or other obsidian accessory
Obsidian Skull or other obsidian accessory
The Underworld (aka Hell) is found at the bottom of the world. The best items pre-hardmode can be found in or crafted from items found in this biome. Shadow Chests found here can only be opened with the Shadow Key, found in the Dungeon.
Hell is theoretically the hardest major biome in normal mode, and generally, the last biome players explore pre-hardmode. In reality, by employing the appropriate strategies, the Underworld is not so difficult and it is even completely possible for a new character to venture here.
The greatest danger working in Hell is, unsurprisingly, the wide expanses of molten lava. Fortunately, the game provides an array of tools to make working around lava safe and painless. The most important of these is probably the Water Walking Potion, which might well be called the Lava Walking potion as that is probably how it is used 99% of the time. Note that this potion has an alarming tendency to still dunk you in lava pools from time to time, where you can seem to "slip" when walking onto the lava surface from blocks, which is why additional precautions should also be taken. The Lava Waders are the ultimate accessory in hell, although it can be difficult to find all the components. Otherwise, the Lava Charm is an invaluable aid. If you have neither of these accessories, Obsidian Skin Potions are a fantastic alternative. When used, the potion gives you a four-minute invulnerability to lava, and yet making the lava even less dangerous than water. There is no breath meter in lava, so as long as you have potions, you can stay in lava indefinitely.
Another reason Hell is less dangerous than you might expect is that the primary economic activity in Hell is Hellstone mining, which has a surprisingly good safety record. Hellstone mining is quite time-consuming and is the main reason to spend time in Hell. The first thing you'll need is an Obsidian Skull or another obsidian accessory to prevent Hellstone ore and bricks from burning you. There are many strategies to mine Hellstone, but perhaps the simplest and most straightforward is what might be called the low-hanging fruit method. Abundant deposits of Hellstone spawn next to the buried Ruined Houses, which act as preexisting mine shafts. Instead of going to significant effort to bury deep into the earth and construct lava channels, just nab the ones that spawn close to the walls and move on quickly to the next house. Monster spawn rates are low in the Ruined Houses, and the architecture and poor pathing AI prevent most of them from bothering you, except the Fire Imps and Bone Serpents which can penetrate blocks. You can block the Fire Imp shots with any weapon or projectile, including your swinging pickaxe, so even these are little more than annoying. As always, the Vilethorn is an MVP if you have one.
You can mine and pick up Hellstone up to 3 blocks away from your character, and Hellstone deposits are frequently around 3 blocks thick outside the houses. Remove the wall then mine the last two rows of Hellstone, leaving the row nearest you as a buffer for the lava. Then replace the wall and mine the last row and you need not worry about where the lava is going. In this way, even a small world should yield enough easily accessible Hellstone around the Ruined Houses to craft all the Hellstone items. For more Hellstone mining strategies, see Guide:Mining Techniques#Mining Hellstone.
Once you have all the hellstone gear you want, you may want to farm Demons for the Demon Scythe, which decimates the Wall of Flesh and is invaluable for quite a while into hardmode, or search Shadow Chests for the Hellwing Bow, which does the same if you have plenty of Wooden Arrows (other arrows are not as effective).
One last note: if you kill a Voodoo Demon, you better be ready to get under that Voodoo Doll before it drops into the lava, or you will be in for a nasty fight you're not prepared for. Should you accidentally awaken the Wall of Flesh, you might want to save and exit, as using a Magic Mirror will gib you.
Activating Hardmode
Defeating the Wall of Flesh will activate hardmode. Once the world has entered hardmode, there is no way of going back to easymode. Hardmode is pretty self-descriptive: routine tasks in easymode can become difficult and time-consuming once there, and it is, therefore, wise to complete any tasks and preparations you can before entering hard mode.
Preparing For Hardmode
The following is a list of preparations you may wish to consider before summoning the Wall of Flesh:
- Obtain maximum health and mana if you have not already done so.
- Craft Hellstone equipment. Hellstone equipment is the best equipment available in Pre-Hardmode, although you may have reason to prefer Shadow Armor, Crimson Armor, Meteor Armor, Necro Armor, Jungle Armor, or Bee armor to Molten Armor. Night's Edge is the highest-tier sword (Bee keeper is also a good option).
- Ensure you've obtained key normal mode accessories and items such as: Frostspark Boots, Lava Waders, Diving Gear, Frog Leg, Flying Carpet, Lucky Horseshoe, Obsidian Shield, Magic Cuffs, Feral Claws, Ivy Whip, Magic Mirror, Mining armor and Metal Detector. Many of these accessories can be combined from others at the Tinkerer's Workshop and the base accessories and items will be much harder to get during hardmode.
- Ensure you have a sufficient stock of potion ingredients. You may consider creating "farms" for certain ingredients. For more information on farming, see Guide:Gardening.
- Identify Demon Altar or Crimson Altar locations. Most Demon and Crimson Altars are found in the Corruption and Crimson, respectively, so explore each Corruption or Crimson biome in the world. You may need to dig tunnels to visible Altars. They need to be easily accessible when hardmode begins (further information in the Hardmode section).
- Consider creating quarantines. You may wish to contain the spread of the Corruption/Crimson, and Hallow biomes in Hardmode which will otherwise quickly overtake your world. There are a few reasons you might want to do this: these biomes are very hard when first entering hardmode, your base can be converted and NPCs will not live near Corruption or Crimson, there are some unique drops only available from "natural" biomes, and many fish, especially quest fish, can only be caught in "natural" biomes (at the least, you may wish to take steps to quarantine fishing lakes). You may particularly wish to protect the Jungle and Ocean biomes in their natural state.
Note that building quarantines can be painstaking and very time-consuming, particularly on larger maps, and may be more trouble than it's worth. To make a long story short, hallow/corruption/crimson blocks can convert certain blocks up to 3 blocks away; therefore, containing them requires digging trenches three blocks wide and also cleared of background wall (e.g., a three-block-wide hellevator or a horizontal tunnel as tall as your character). Killing the Wall of Flesh will spawn two stripes of Hallow and Corruption/Crimson in a V from the top to the bottom of the world, so to do a full containment you would need to dig trenches around all the existing Corruption/Crimson, then once in hardmode around all the "V" from the surface to hell, and then you need to contain all the random Hallow/Corruption/Crimson that springs up when you break Altars. We are talking about a lot of digging, even if it is made much faster with the new automining feature, Mining Armor and Mining Potions (back in the old days, we used to dig quarantines with our bare hands!).
For more information on building quarantines, read Guide: Containing the Hallow/Corruption.
- Reforge weapons and accessories. You'll generally want extra defense, damage, or critical strike chance. Don't go overboard with this as all your equipment will quickly be replaced with WoF drops and hardmode gear anyway, plus you've yet to obtain the super-duper Discount Card. For more information about item prefixes, see Reforge.
- Consider farming money. Some vendors sell new, very expensive items in hardmode and reforging Hardmode weapons is extremely expensive. For more information on farming money, see Guide:Making money.
- Construct an arena for upcoming boss fights. This arena should be about two screen lengths wide and one screen height tall, with about six or seven blocks of space between horizontal rows of platforms. Consider adding Campfires, Heart Lanterns and a small pool of honey.
- Finish excavating your hellavator or start on it if you don't have one, to make it easier to get to underground areas in hardmode without slogging through a bunch of ganged up monsters.
- Excavate a fishing lake near your base if you don't have one already. You don't want to risk your life in hardmode going to a spot halfway across the map to fish. You may also want to have a decently sized lake of honey to farm Honeyfin, which are easier to get than Greater Healing Potions and restore 120 health.
- Construct a surface Mushroom biome with a house for the Truffle NPC, as gathering the necessary materials will become much harder during hardmode. The Truffle is an NPC who sells the Mushroom Spear, a very powerful weapon in hardmode. However, it can now only be purchased when you have defeated at least one hardmode boss. Note that a room of sufficient size in your base with mushroom blocks should qualify.
- Optionally, Make sure you have 21 valid NPC houses, so you don't have to worry about building them later on (possibly during a hardmode event or invasion).
Wall of Flesh


Wall of Flesh
Life: 8000 (Eyes, Mouth), 320 (The Hungry), 60 (Leech)
Damage: 11-15 depending on health (Eye laser), 50 melee (Eyes, Mouth), 30-75 depending on health (The Hungry), 18-26 (Leech)
Defense: 12 (Mouth), 0 (Eyes), 10-40 depending on health (The Hungry), 2-10 (Leech)
Drops: ![]() Pwnhammer,
Pwnhammer,  Breaker Blade,
 ![]() Clockwork Assault Rifle,
Clockwork Assault Rifle, ![]() Laser Rifle,
Laser Rifle, ![]() Warrior Emblem,
Warrior Emblem, ![]() Ranger Emblem,
Ranger Emblem, ![]() Sorcerer Emblem,
Sorcerer Emblem, ![]() Summoner Emblem
Summoner Emblem
Recommended Weapons: Minishark, Phoenix Blaster, Molten Fury w/ Hellfire Arrows, Grenades, Space Gun, Demon Scythe
Recommended Armor: Crimson, Necro, Meteor, Jungle, or Molten
Recommended Life:The Wall of Flesh (WoF) will be summoned when a Guide Voodoo Doll is dropped by you or a Voodoo Demon into the lava in the Underworld, which will kill the Guide. Note that it will not spawn if the Guide is not alive, if you are fighting the WoF multiple times. Once the battle is started, you cannot run away or get behind WoF: if WoF catches up to you or you attempt to leave the Underworld, you will be grabbed by The Tongue and take serious damage. If you attempt to teleport away such as with a Magic Mirror, you will be gibbed instantly. You can save & exit to cancel the battle without dying.
The WoF will spawn just outside of the screen in the direction closest to the end of the world and start moving slowly towards you, speeding up as its health decreases. WoF is preceded by a pack of The Hungry, which will try to attack the player and are attached to the WoF by veins. When they take enough damage, they will detach and fly and attack the player. WoF will also burp Leeches from its mouth which chase players. Both the flying Hungry and Leeches drop hearts when they die.
WoF has two eyes that shoot lasers and a mouth that share HP. These are the only 3 body parts that take damage, and because the eyes have no defense, you should aim for them.
As usual for boss fights, attacking from distance is recommended. Because the pack of the Hungry can block shots at the eyes at the beginning of the fight, you may wish to begin by using AoE weapons such as grenades, hellfire arrows, or demon scythes to clear out the Hungry before switching to your main weapon.
You may wish to build an arena for this fight, consisting of a long, uninterrupted landbridge of 500 blocks or more. Although it is not necessary to beat WoF, there is no doubt it will make the fight significantly easier. You won't have to dodge terrain, the bridge will catch hearts and other drops, and it will typically block the lasers from the lower eye from hitting you, effectively halving the damage you take. If you intend to run WoF for all its drops, a landbridge is highly recommended. It will take 15 kills on average to get all 6 of WoF's drops. Subsequent runs become easier as you can use the WoF drops to make the fight go much faster. (Pro tip: if you make your landbridge out of mud and plant some mushroom seeds on it, you'll soon have a nice little glowing mushroom farm for zero additional effort. Using ash will yield fireblossom, and dirt will yield blinkroot- but be mindful that Hardmode will convert dirt to Corrupt, Crimson, or Hallowed Grass.)
If you don't wish to build a landbridge, it is recommended to start the fight at the edge of the Underworld where it is flat and use a Water Walking Potion so you can walk on the lava almost like it is paved.
Once Wall of Flesh is defeated you will receive a message which says "The ancient spirits of light and dark have been released". You have now entered Hardmode.
Hardmode
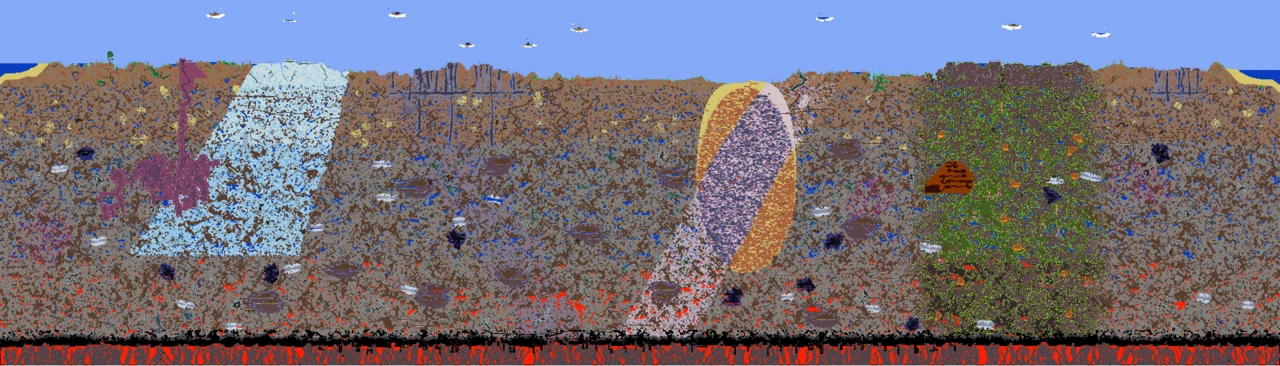
Initial Hardmode map of a small PC-version world. Notice the "V" made of the new outburst of Corruption (dark purple) and Hallow (pale pink) biomes, which each replace existing world blocks upon defeat of the Wall of Flesh.
Hardmode in a nutshell: same scenery, new stuff. For complete details, read Hardmode. Summary of changes:
- New biomes (Hallow & Underground Hallow, Underground Corruption or Crimson) that generate in a V shape (see picture) and quickly spread and convert your world
- New hardmode enemies in existing biomes (alongside normal enemies), and bosses
- New events
- New items (including weapons, armor, and accessories)
- New hardmode ores
- New NPCs
See How Hallow/Corruption/Crimson Spread and How To Contain It (scroll down to “Consider Creating Quarantines”)
Smashing Altars
Setting foot in a hardmode world is much like being a newbie in the Forest all over again. You’re inadequately equipped and almost everything is much stronger than you. To remedy that, once again, you will venture underground in search of ore to get some decent gear. But first, you’ll need to make a detour because none of that shiny new ore actually exists yet. You’ll have to whack a few Demon Altars or Crimson Altars with the Pwnhammer to make it. Every time you destroy an Altar, ore will be generated in various places underground, spawning more densely at lower depths. The first altar destroyed will spawn Cobalt / Palladium. The second altar destroyed will spawn Mythril / Orichalcum. The third altar destroyed will spawn Adamantite / Titanium. The pattern will repeat with additional altars destroyed, spawning more Cobalt, then more Mythril, then more Adamantite. Twelve altars is a good number to aim for (you should try to ensure you smash a multiple of three).
Also note, however, that each altar destroyed may spawn a new block of Ebonstone/Crimstone, or Pearlstone somewhere in the world, causing the respective biomes to spread from another location.
The easiest place to find altars is in the underground Corruption or Crimson biomes, at the bottom of ebonstone chasms or inside large crimstone caves, respectively. You may notice that many often generate in a row; you may be able to even fill your quota in one go. Note that this is quite a dangerous activity. In addition to the challenging underground Corruption/Crimson enemies you encounter, every time you smash an altar you will also generate one to three Wraiths. You may want to carefully dispatch them one at a time (note: they can float but can’t actually fly, so hang from the ceiling), or perhaps go full Captain Kirk and smash them all at once and Magic Mirror out before your innards get rearranged.
On your way to smash altars, you may find yourself passing through some of these biomes:
New Monsters: Possessed Armor, Wandering Eye, Wraith, Clown (Blood Moon), Werewolf (Full moon)
Monster Drops: ![]() Fast Clock,
Fast Clock, ![]() Megaphone,
Megaphone, ![]() Bananarang and
Bananarang and ![]() Trifold Map (from Clowns),
Trifold Map (from Clowns), ![]() Moon Charm (from Werewolves)
Moon Charm (from Werewolves)
Recommended Equipment: Molten
Be cautious when exploring the surface at night. New, more powerful monsters come out at night. A player used to traveling at night may find it difficult to progress when they are out after dark.
Desert Biome (Hardmode)
New Monsters: Mummy (unconverted desert only), Dark Mummy (Corrupted/Crimson Desert) Light Mummy (Hallowed Desert)
Monster Drops: ![]() Dark Shard (Corrupt/Crimson Desert) or
Dark Shard (Corrupt/Crimson Desert) or ![]() Light Shard (Hallowed Desert)
Light Shard (Hallowed Desert)
Recommended Equipment: Molten
Natural deserts typically don't last long in hardmode. When corrupted, crimsoned, or hallowed, they become very similar to their respective biomes. Hardmode deserts are the only places where the Mummy can be found.
Hallow Biome
Monsters: Pixie, Unicorn, Gastropod (night only)
Monster Drops: ![]() Pixie Dust,
Pixie Dust, ![]() Unicorn Horn,
Unicorn Horn, ![]() Blessed Apple
Blessed Apple, ![]() Megaphone,
Megaphone, ![]() Fast Clock,
Fast Clock, ![]() Unicorn on a Stick
Unicorn on a Stick
Recommended Equipment: Molten
The Hallow spreads rapidly through the world, just like the Corruption and Crimson. Be wary of the seemingly whimsical denizens of the Hallow. All of them are hostile and are just as dangerous as their corrupted counterparts. Like with the evil biomes, players new to Hardmode should avoid staying in this biome for longer than necessary.
New Monsters: Corruptor, Slimer, Corrupt Slime
Monster Drops: ![]() Blindfold
Blindfold
Recommended Equipment: Molten
Corruption now spreads through the world at a fast pace. Players that are new to Hardmode should move through this biome as quickly as possible. An under geared player will be easily overwhelmed in this biome.
New Monsters: Herpling, Crimslime, Blood Jelly
Monster Drops: ![]() Meat Grinder
Meat Grinder
Recommended Equipment: Molten
Crimson spreads identically to Corruption, and is just as dangerous, or perhaps even worse, since the Herpling, which has no corrupt counterpart, exists. They are very fast, have a low hitbox, high health and defense, absurd attack power and are generally a pain to deal with, even mid-hardmode. Their only significant weakness, or rather, lack of strength, is rough terrain, as they will have difficulty reaching the high speeds they often use to surprise players. Extra caution is advised, especially in flat terrain.
Mining Hardmode Ores
Once enough ore has been spawned, the player should begin mining Cobalt/Palladium with a Molten Pickaxe. Mythril/Orichalcum and Adamantite/Titanium can not be mined with normal mode pickaxes. Proceed with extreme caution. The most difficult biomes in Hardmode are found underground. The player should bring a stock of Ironskin, Regeneration, and Spelunker potions to use as they mine. If the player created a hellevator in normal mode, they should use it to access the lower layers quickly. Hardmode ores are more abundant deeper underground.
New Monsters: Toxic Sludge, Digger, Possessed Armor (night)
Recommended Equipment: Molten, Meteor or Crimson armour, Molten Pickaxe, Phoenix Blaster, Fiery Greatsword or Night's Edge, Flamarang, Demon Scythe
This previously trivial biome has had its difficulty increased significantly. Hardmode ores are not very common in this layer. It is best to pass through to lower layers, the best location being right above the underworld and below the lava layer of the Caverns.
New Monsters: Armored Skeleton, Skeleton Archer, Giant Bat, Digger, Angler Fish (water), Green Jellyfish (water), Mimic
Monster Drops: ![]() Armor Polish,
Armor Polish,  Beam Sword (rare),
 ![]() Magic Quiver,
Magic Quiver, ![]() Marrow,
Marrow,
- Mimic Drops: Dual Hook, Magic Dagger, Titan Glove, Philosopher's Stone, Cross Necklace, Star Cloak, Light Disc
Recommended Equipment: Molten, Molten Pickaxe
This biome is very dangerous, but it is less dangerous than the Underground Corruption, Crimson, and Hallow. It is for this reason that this biome is one of the ideal biomes for mining hardmode ores. However, don't underestimate the new monsters in this biome, because they are all very strong; the Armored Skeleton's "Broken Armor" debuff is particularly lethal, even for an endgame character. Consider returning to town and talking to the Nurse if hit by the debuff. They sometimes drop ![]() Armor Polish, which prevents the debuff and will be very helpful later on. The Mimic will also spawn underground here, and if you can, attempt to take some down. You can use the Lifeform Analyzer to tell when these enemies are near. Be wary, however, that even they will inflict high amounts of damage, so ranged and/or high knockback weapons are recommended.
Armor Polish, which prevents the debuff and will be very helpful later on. The Mimic will also spawn underground here, and if you can, attempt to take some down. You can use the Lifeform Analyzer to tell when these enemies are near. Be wary, however, that even they will inflict high amounts of damage, so ranged and/or high knockback weapons are recommended.
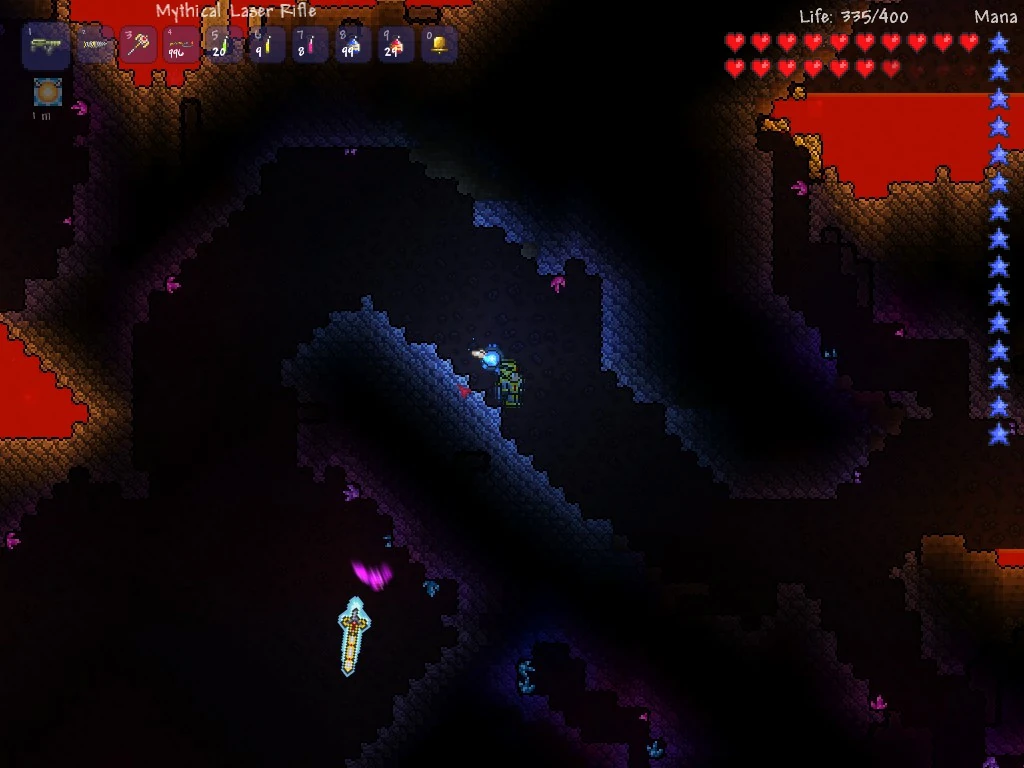
Underground Hallow
Monsters: Chaos Elemental, Illuminant Bat, Illuminant Slime, Enchanted Sword, Hallowed Mimic
Monster Drops: ![]() Soul of Light,
Soul of Light, ![]() Blessed Apple
Blessed Apple, ![]() Rod of Discord
Rod of Discord
- Mimic Drops: Daedalus Stormbow
,Flying Knife,Crystal Vile Shard,Illuminant Hook
Notable Resources: ![]() Crystal Shard
Crystal Shard
Recommended Equipment: Mythril or Palladium; Ironskin Potions and Regeneration Potions
This is one of the most difficult biomes in Terraria. It is recommended to mine elsewhere until Mythril Armor or better is obtained. Chaos Elementals and Enchanted Swords can easily reach the player, even when they are boxed in. If you do decide to venture in and run into a Hallowed Mimic in chest form (it's not hard to tell), avoid going near, and especially avoid attacking it. At this stage in the game, any of these Mimics can kill you before you can attempt to run. If one is already on your tail, you should attempt to use your magic mirror at the nearest convenience, regardless of how badly you might want to kill it.
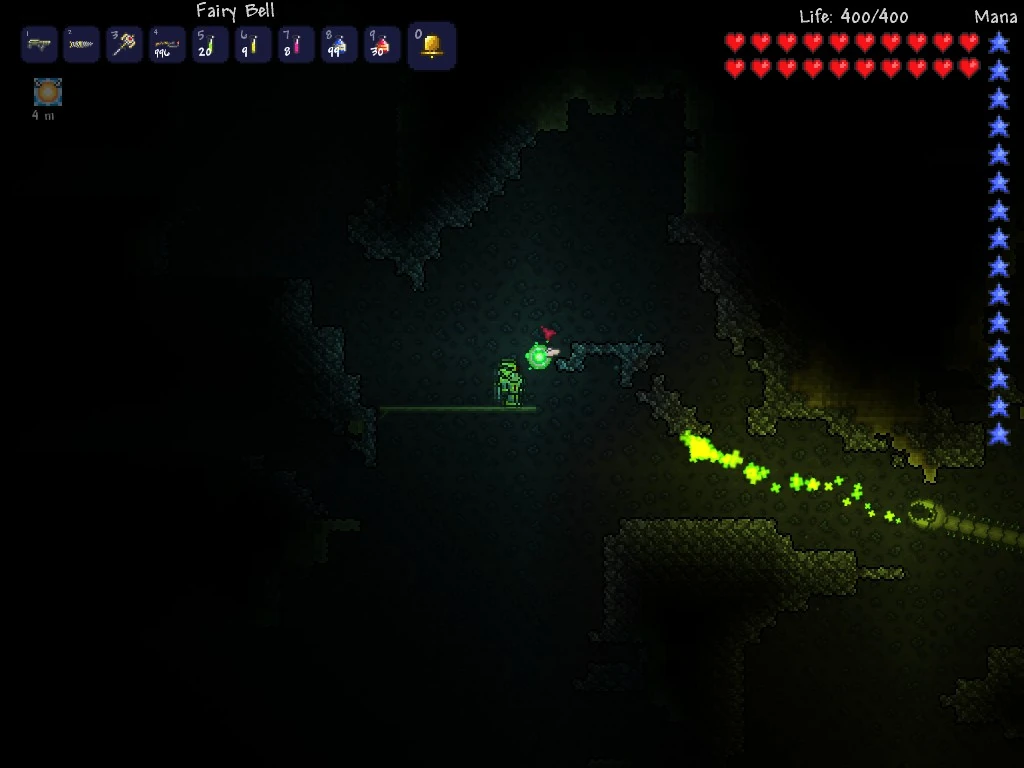
Underground Corruption
Monsters: Clinger, Corrupt Slime, Corruptor, Cursed Hammer, Devourer, Slimer, World Feeder
Monster Drops: ![]() Soul of Night,
Soul of Night, ![]() Cursed Flame,
Cursed Flame, ![]() Nazar,
Nazar, ![]() Vitamins
Vitamins
- Mimic Drops: Dart Rifle
,Worm Hook,Chain Guillotines,Clinger Staff,Putrid Scent
Recommended Equipment: Mythril or Palladium; Ironskin Potions and Regeneration Potions
As with the Underground Hallow, it is recommended that the player avoids this biome until they obtain Mythril Armor. The denizens of this biome will make mining extremely difficult for a player without hardmode armor.

Underground Crimson
Monsters: Ichor Sticker, Floaty Gross, Blood Jelly, Blood Feeder, Crimson Axe
Monster Drops: ![]() Soul of Night,
Soul of Night, ![]() Ichor,
Ichor, ![]() Nazar,
Nazar, ![]() Vitamins,
Vitamins, ![]() Meat Grinder
Meat Grinder
- Mimic Drops: Life Drain
,Dart Pistol,Fetid Baghnakhs,Flesh Knuckles,Tendon Hook
Recommended Equipment: Mythril or Palladium; Ironskin Potions and Regeneration Potions
Similarly the underground Corruption and Hallow, the Crimson should be avoided early on in hardmode. Attempt to stay farther from this biome than others, though, as Floaty Grosses can pass through blocks, even if you aren't in the biome.
Underground Mushroom Biome
Monsters: Fungi Bulb, Anomura Fungus, Mushi Ladybug, Giant Fungi Bulb, Fungo Fish
Monster Drops: None
Notable Resources: ![]() Truffle Worm
Truffle Worm
Recommended Equipment: Mythril or Palladium; Ironskin Potions and Regeneration Potions
The player can find Truffle Worms in this biome, which are used to summon Duke Fishron. The other monsters in the biome don't drop any special items. Their health is comparable to those of other underground biomes, and their attacks, especially those of the Giant Fungi Bulb, can be very dangerous. If you are exposed to the biome directly, you may be hit by the Fungi Bulb's attacks, which are very small but deal a lot of damage. Stay away from this biome unless you need an emergency supply of Glowing Mushrooms or Mushroom Seeds.
It can be very difficult to survive long enough in Hardmode biomes to mine enough ore. If the player finds they are having difficulty mining, they should consider looking for ores in the ceiling of the Underworld. This biome has the same mobs as it did pre-Hardmode, making it considerably safer than almost anywhere else in the world.
Aim to upgrade to a ![]() Cobalt Drill or
Cobalt Drill or ![]() Palladium Drill (or their pickaxe equivalents) as quickly as possible. The Cobalt Drill or Pickaxe and its counterpart can mine Mythril/Orichalcum. The first 100 Mythril/Orichalcum ore mined should be used to craft a
Palladium Drill (or their pickaxe equivalents) as quickly as possible. The Cobalt Drill or Pickaxe and its counterpart can mine Mythril/Orichalcum. The first 100 Mythril/Orichalcum ore mined should be used to craft a ![]() Mythril/Orichalcum Anvil and then a Mythril Drill (or their Orichalcum counterparts). The Mythril Drill and Pickaxe (and their Orichalcum counterparts) can mine Adamantite/Titanium (as can the Palladium Drill in the console version, letting you get a head start if you obtain Palladium instead of Cobalt; however, the drill's power was reduced in 1.2.3, so this exploit no longer works on PC). The first 30 Adamantite/Titanium ore mined should be used to create an
Mythril/Orichalcum Anvil and then a Mythril Drill (or their Orichalcum counterparts). The Mythril Drill and Pickaxe (and their Orichalcum counterparts) can mine Adamantite/Titanium (as can the Palladium Drill in the console version, letting you get a head start if you obtain Palladium instead of Cobalt; however, the drill's power was reduced in 1.2.3, so this exploit no longer works on PC). The first 30 Adamantite/Titanium ore mined should be used to create an ![]() Adamantite Forge or
Adamantite Forge or ![]() Titanium Forge. Upgrading to an Adamantite Drill or Titanium Drill isn't crucial, as it does not grant access to any new ores.
Titanium Forge. Upgrading to an Adamantite Drill or Titanium Drill isn't crucial, as it does not grant access to any new ores.
Be mindful when opening chests. A seemingly innocuous treasure chest may be a Mimic posing as a chest. Mimics will chase the player when they approach or when attacked. A good approach is to shoot any chests with a ranged weapon before opening them. This will cause any Mimics to break their ruse and attack. With this danger comes great reward, as Mimics can drop items that are incredibly useful in hardmode, such as the Cross Necklace, and also always drop several gold coins.
Use any leftover ore to upgrade armor, then weapons, and lastly tools. Keep mining until enough Adamantite or Titanium is collected to craft a full set of armor and any weapons or tools the player may want.
The Goblin Army (Hardmode)
New Monsters: Goblin Summoner
Monster Drops: ![]() Shadowflame Hex Doll
Shadowflame Hex Doll, ![]() Shadowflame Knife
Shadowflame Knife, ![]() Shadowflame Bow
Shadowflame Bow
Recommended Equipment: Adamantite/Titanium or better, Demon Scythe, Crystal Storm, Golden Shower, Lightning Boots, Wings
Whilst you're preparing for the mechanical bosses, old enemies may decide to rear their ugly heads again -- the Goblin Army. This time, it's much more difficult with the new Goblin Summoner in the mix. She will tear you up and cut you apart with her highly damaging spells. However, it is indeed worth the trouble to defeat her, as she can drop powerful weapons, like the Shadowflame Bow, which can prove devastating when used against the mechanical bosses, as these weapons can inflict the Shadowflame debuff, dealing 5 damage per second. Also, the Shadowflame Bow's arrows can pierce, making it extra powerful against the Destroyer.
The Great Run-up
Whilst you're trying to find enough ore to make better gear, it's highly recommended that you make the following other preparations in the run-up to the mech bosses:
- Make sure you have a home for the Wizard. Like the Goblin Tinkerer and Stylist, he can be found tied up underground. This NPC is pretty much mandatory for magic users, as he is the only source of Spell Tomes, which are needed to craft the Golden Shower, Cursed Flames and Crystal Storm, all of which are devastating to many of the hardmode monsters you've run up against by now. The Wizard also sells Greater Mana Potions (a must in any boss fight by now) and crafting ingredients used to craft some very powerful spells made with mech boss drops.
- Be sure your arena is ready for the upcoming fights. If you haven't done so already, place some Campfires of any kind, Heart Lanterns, and Honey, and wire up the Heart and Star Statues that you may have collecting dust by now. Of course, if you didn't figure it out already, the mech bosses are going to be tough and grueling, even with the weapons you may have found, especially in Expert Mode, so you'll need all the preparation you can make for them.
- Make sure you have a full set of buff potions and at least half a stack of Greater Healing Potions or Honeyfin, especially in Expert Mode. The mech bosses' damaging attacks will eat away at your health very quickly, so the better the heals, the less you'll be desperate not to get ripped apart. (Honeyfin can be easily fished up from a good-sized lake of honey and don't require you to risk your life in the Underground Hallow looking for crystals.)
Collecting Souls
Collecting souls (and other miscellaneous items) is the last task the player should complete before fighting the mechanical bosses. There are three types of souls dropped by normal monsters: Soul of Light, Soul of Night, and Soul of Flight. Souls of Light can be obtained from any monster found in the Underground Hallow, Souls of Night can be obtained from any monster found in the Underground Corruption or Crimson, and lastly, Souls of Flight can be obtained from Wyverns. The order in which the player obtains these souls does not matter. However, it can be advantageous to gather Souls of Flight first, as Wings are very useful when navigating the Underground Hallow or Underground Corruption.
Soul of Flight
Wyverns can be found at very high altitudes, at around the same level as Floating Islands. Look for Wyverns on Floating Islands, as it is much easier to fight them this way.

Floating Island (Hardmode)
New Monsters: Wyvern, Arch Wyvern Template:Mobile icon Template:Console icon
Monster Drops: ![]() Soul of Flight
Soul of Flight ![]() Shadow Key (from Arch Wyvern)
Shadow Key (from Arch Wyvern)
Recommended Equipment: Adamantite or Titanium armour, piercing weapons (Demon Scythe is particularly effective), and Gravitation, Ironskin, and Regeneration potions
The only hardmode addition to floating islands is the Wyvern enemy. These Wyverns are of interest because they drop Souls of Flight, which are required to craft wings.
Wyverns are very difficult to kill. They fly through the air using the same AI as worms, but they move much faster, do much more damage, and have a lot more life. They are very difficult to dodge and attack at the same time. Piercing weapons are very effective against the Wyvern, like with all segmented monsters. Killing them can be made easier by using the slimy saddle mount (dropped by the King Slime) because you can jump on top of them without them damaging you.
Soul of Light
Souls of Light can be found by killing enemies in the Underground Hallow. Underworld Enemies spawned below the Underground Hallow will also drop Souls of Light. Keep a stock of Regeneration potions and Ironskin potions when exploring this biome. The easiest way to deal with hallowed enemies is to grapple to the ceiling and shoot at them with a ranged weapon. The opposite is true when dealing with Illuminant Bats. Drop to the ground and swing a melee weapon to deal with them. Try to gather crystal shards while looking for souls. Try to gather at least 50 souls, although more is better. If the Hallow in your world went through a Spider Nest, you can also farm the spiders, taking advantage of their fast spawn rate, for Souls of Light.
Soul of Night
Souls of Night can be found by killing enemies in the Underground Corruption and Crimson. Underworld Enemies will also drop Souls of Night if they spawn below the Underground Corruption or Crimson. Many of the same rules apply within these biomes. Use Ironskin and Regeneration potions when exploring. Try not to stay in one place for too long in this biome. Clingers, Corruptors, and Ichor Stickers can all shoot projectiles; World Feeders and Floaty Grosses can easily attack a stationary player; and the rare Hallowed, Crimson, and Corrupt Mimics can pose a serious danger for the unprepared. Make use of Lightning/Frostspark Boots or Wings to dodge projectiles and keep moving around. Try to gather at least 50 souls, although more is better. Look for Cursed Flames or Ichor while gathering souls. Also, the spider nest farming method works well for Souls of Night too.
Miscellaneous Items
There are a few other important items not mentioned above.
- Pixies from the surface Hallow will drop Pixie Dust, which is needed to make Greater Healing Potions, or combined with Unicorn Horns to make Holy Arrows.
- Mummies from the Corrupt or Crimson Desert will drop Dark Shards; Mummies from the Hallowed Desert will drop Light Shards. Collect these to craft the Dao of Pow.
- Biome Keys have an extremely rare chance to drop from enemies in the five main biomes (Hallow, Corruption, Crimson, Jungle, and Snow). After Plantera is defeated (later on), these can be used to open the Biome Chests in the Dungeon, which contain extremely powerful items.
- Mimics can appear in just about any biome. Look for Mimics using Hunter Potions or a Lifeform Analyser and kill them until you get a Philosopher's Stone and a Cross Necklace.
- Fifteen Souls of Light or Night can be used to make Light or Night Keys, respectively. A Key of Light or Night placed into an empty chest will create Hallowed or Corrupt/Crimson Mimics, which are larger than normal mimics and more dangerous. The Hallowed Mimic has a good chance of dropping the Daedalus Stormbow, which can be used with Holy Arrows to quickly decimate any of the three Mechanical Bosses.
- Hallowed, Corrupt and Crimson Mimics can also naturally appear in their respective underground biomes, so be prepared for a fight when you go underground.
The Three Mechanical Bosses
Once you have a stockpile of the various hardmode resources, it's time to begin preparing to defeat the first three hardmode bosses. Each must be summoned with an item that can be crafted or dropped by enemies. It's also possible for one to spawn on its own at sunset, though the player will probably not be able to defeat it unless they are well prepared.
Recommended Equipment for Mechanical Bosses
Following is a list of equipment recommendations for use against the mechanical bosses. This is not an exhaustive list; other items may prove to be effective. This list assumes no Hardmode bosses have been defeated yet:
Melee Characters
Recommended Weapons: ![]() Dao of Pow,
Dao of Pow,  Titanium Sword, Beam Sword,
  Frostbrand or
  Titanium Trident,,
 ![]() Flamarang,
Flamarang, ![]() Bananarang
Bananarang
Recommended Armor: ![]() Titanium armor with Titanium Mask,
Titanium armor with Titanium Mask, ![]() Adamantite Armor with Adamantite Helmet
Adamantite Armor with Adamantite Helmet
Recommended Accessories: ![]() Frostspark Boots,
Frostspark Boots, ![]() Wings,
Wings, ![]() Warrior Emblem,
Warrior Emblem, ![]() Star Veil,
Star Veil, ![]() Obsidian Shield,
Obsidian Shield, ![]() Charm of Myths; all with Defense (highly recommended) or Damage enhancing prefixes
Charm of Myths; all with Defense (highly recommended) or Damage enhancing prefixes
Recommended Buffs: ![]() Ironskin Potion,
Ironskin Potion, ![]() Regeneration Potion,
Regeneration Potion, ![]() Shine Potion,
Shine Potion, ![]() Swiftness Potion,
Swiftness Potion, ![]() Cooked Fish,
Cooked Fish, ![]() Ale and any
Ale and any ![]() Flask the boss is not immune to.
Flask the boss is not immune to.
Ranged Characters
Recommended Weapons: ![]() Adamantite or
Adamantite or ![]() Titanium Repeater,
Titanium Repeater, ![]() Clockwork Assault Rifle,
Clockwork Assault Rifle, ![]() Daedalus Stormbow
Daedalus Stormbow or ![]() Uzi
Uzi
Recommended Armor: ![]() Titanium armor with Titanium Helmet,
Titanium armor with Titanium Helmet, ![]() Adamantite Armor with Adamantite Mask
Adamantite Armor with Adamantite Mask
Recommended Accessories: ![]() Frostspark Boots,
Frostspark Boots, ![]() Wings,
Wings, ![]() Ranger Emblem,
Ranger Emblem, ![]() Obsidian Shield,
Obsidian Shield, ![]() Star Veil,
Star Veil, ![]() Charm of Myths; all with Defense (highly recommended) or Damage enhancing prefixes
Charm of Myths; all with Defense (highly recommended) or Damage enhancing prefixes
Recommended Buffs: ![]() Ironskin Potion,
Ironskin Potion, ![]() Regeneration Potion,
Regeneration Potion, ![]() Shine Potion,
Shine Potion, ![]() Swiftness Potion,
Swiftness Potion, ![]() Cooked Fish,
Cooked Fish, ![]() Archery Potion (with Adamantite or Titanium Repeater)
Archery Potion (with Adamantite or Titanium Repeater)
Magic Characters
Recommended Weapons: ![]() Laser Rifle,
Laser Rifle, ![]() Flamelash, or
Flamelash, or ![]() Crystal Storm/
Crystal Storm/![]() Golden Shower. (Golden Shower works extremely well against the Destroyer when you aim along the arc of the Destroyer. Also, the Crystal Storm, being the mana Megashark of the game, works very well against all hardmode bosses.)
Golden Shower. (Golden Shower works extremely well against the Destroyer when you aim along the arc of the Destroyer. Also, the Crystal Storm, being the mana Megashark of the game, works very well against all hardmode bosses.)
Recommended Armor: ![]() Titanium armor with Titanium Headgear,
Titanium armor with Titanium Headgear, ![]() Adamantite Armor with Adamantite Headgear
Adamantite Armor with Adamantite Headgear
Recommended Accessories: ![]() Frostspark Boots,
Frostspark Boots, ![]() Wings,
Wings, ![]() Mana Flower,
Mana Flower, ![]() Celestial Cuffs
Celestial Cuffs, ![]() Star Veil,
Star Veil, ![]() Obsidian Shield,
Obsidian Shield, ![]() Charm of Myths; all with Defense (highly recommended) or Damage enhancing prefixes
Charm of Myths; all with Defense (highly recommended) or Damage enhancing prefixes
Recommended Buffs: ![]() Ironskin Potion,
Ironskin Potion, ![]() Regeneration Potion,
Regeneration Potion, ![]() Shine Potion,
Shine Potion, ![]() Swiftness Potion,
Swiftness Potion, ![]() Mana Regeneration Potion,
Mana Regeneration Potion, ![]() Magic Power Potion,
Magic Power Potion, ![]() Cooked Fish,
Cooked Fish, ![]() Crystal Ball
Crystal Ball
Summoning Characters
Recommended Weapons: ![]() Spider Staff
Spider Staff, ![]() Queen Spider Staff
Queen Spider Staff, ![]() Imp Staff
Imp Staff
Recommended Armor: ![]() Spider armor
Spider armor
Recommended Accessories: ![]() Panic Necklace,
Panic Necklace, ![]() Wings,
Wings, ![]() Summoner Emblem
Summoner Emblem, ![]() Star Veil,
Star Veil, ![]() Obsidian Shield,
Obsidian Shield, ![]() Frostspark Boots,
Frostspark Boots, ![]() Charm of Myths; all with Defense (highly recommended) or Damage enhancing prefixes
Charm of Myths; all with Defense (highly recommended) or Damage enhancing prefixes
Recommended Buffs: ![]() Ironskin Potion,
Ironskin Potion, ![]() Regeneration Potion,
Regeneration Potion, ![]() Shine Potion,
Shine Potion, ![]() Swiftness Potion,
Swiftness Potion, ![]() Cooked Fish,
Cooked Fish, ![]() Ale,
Ale, ![]() Summoning Potion
Summoning Potion
Building a Hardmode Arena
Proper terrain preparation is almost completely essential to successfully defeat all three mechanical bosses. Players who intend to solo the hardmode bosses will find the task very challenging without an adequate arena.
For solo players, build a very long bridge out of wood platforms. The bridge should be at least 1000 platforms long, but 2500 is recommended. Build the bridge a large distance from the ground; the ground should not be visible from any part of the bridge. Place blocks at each end of the bridge to prevent running off of the sides.
For team players, the arena can be much shorter. A team arena can be between 250-500 platforms long, but should also have 2-3 separate rows. Space the rows so they are not too close together, but are reachable with rocket boots.
Consider setting up Heart Statues and Star Statues on 1 Second Timers, as well as Sunflowers, Heart Lanterns, Campfires, and pools of Honey as these can make the battles much easier.
If you don't quite feel up to the task of making a second very long bridge, you could simply use the first one you built for the Wall of Flesh. this will also make the first fight easier due to all of the ambient light. However, after defeating your first mechanical boss, this becomes much harder due to the additional spawns of Lava Bats and Red Devils.
Fighting the Mechanical Bosses
The Destroyer is arguably the easiest of the three bosses and should be fought first. The Destroyer has a chance of spawning naturally at sunset with the message "You feel vibrations deep below..." It can also be summoned by using a Mechanical Worm at night. Fight the Destroyer first if you prefer melee, as its souls can be used to craft Light Discs.

The Destroyer
Life: 80000
Defense: 0 (Head), 30 (Body), 35 (Tail)
Damage: 60 (Head), 40 (Body), 20 (Tail), 22 (Death Laser)
Minions: Probes
Drops: 20-44 ![]() Hallowed Bar, 20-40
Hallowed Bar, 20-40 ![]() Soul of Might, 5-15
Soul of Might, 5-15 ![]() Greater Healing Potion,
Greater Healing Potion, ![]() Mechanical Wagon Piece
Mechanical Wagon Piece (expert)
Recommended Equipment: See above section "Recommended Equipment for Hardmode Bosses"
The Destroyer is the hardmode version of Eater of Worlds. The Destroyer uses a variation of worm AI, burrowing into the ground and making long sweeping passes at the player. The Destroyer is much longer than the Eater of Worlds and moves much faster. Unlike the Eater of Worlds, the Destroyer does not break into segments. The Destroyer's segments all have a shared life of 80000. All of its segments will be destroyed when this life reaches 0. The Destroyer will release Probes as it takes damage. Probes will drop hearts when killed. If the Destroyer is not defeated before 4:30 AM, it will run away.
Piercing weapons and AoE weapons are particularly effective against this boss. The Destroyer will frequently try to trap you with its body. Use a hook to get out of these situations. The Destroyer's drops come from its head when it is killed. When its health is very low, wait until any of its segments are above the ground before finishing it off.
The destroyer does not despawn if you use a Magic Mirror or Recall Potion to flee and will instead follow you. This can be helpful if the player sets up a house near the spawn point for the Nurse to move in, aiding the player in healing if the player's health is low.
As of 1.2, hallowed equipment (except for the Drax/Pickaxe Axe, which is necessary for progression) doesn't require boss souls; it only requires Hallowed Bars, which you can farm up from the Destroyer.
It is recommended to fight Skeletron Prime next, as ranged characters can make a Flamethrower if he is defeated.
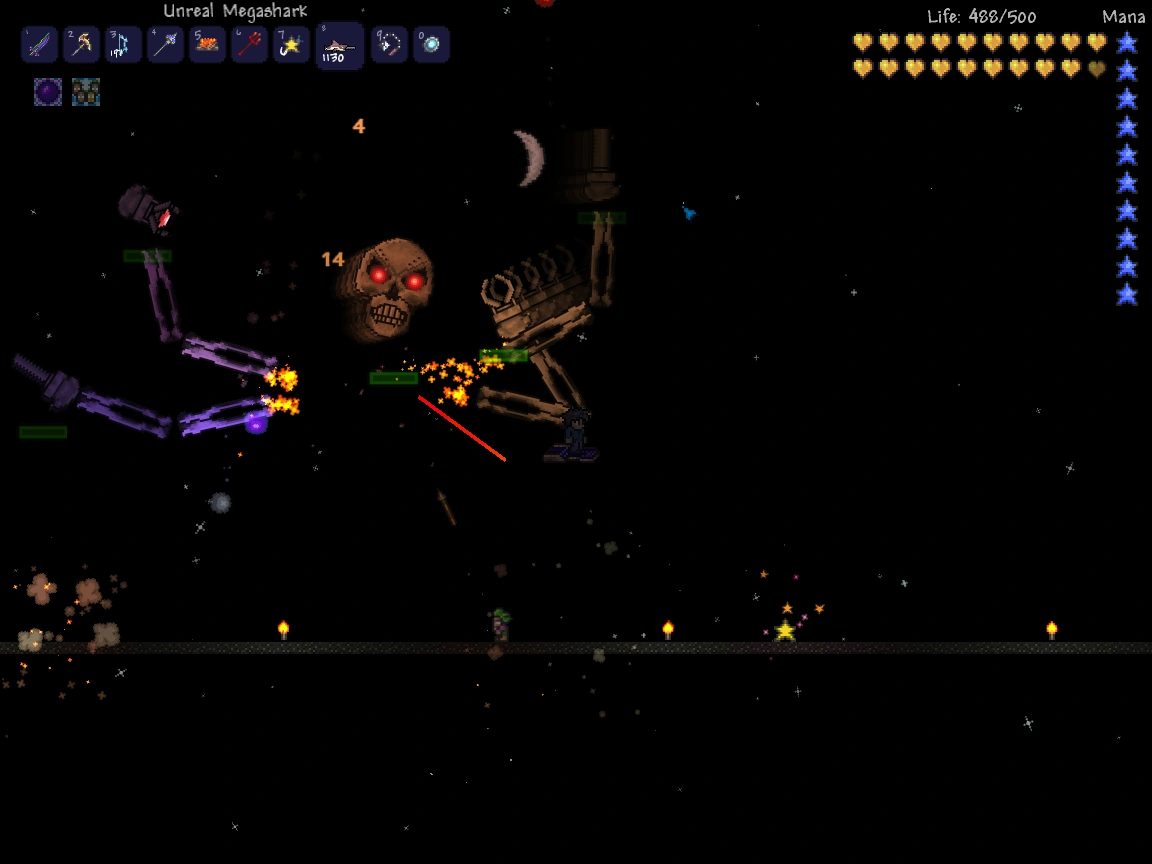
Skeletron Prime
Life: 25000 (Head), 6000 (Cannon), 8000 (Saw), 8000 (Vice), 5000 (Laser)
Defense: 25 (Head), 50 (Head, while spinning), 25 (Cannon), 40 (Saw), 35 (Vice), 20 (Laser)
Damage (Melee): 50 (Head), 100 (Head, while spinning), 30 (Cannon), 52 (Saw), 45 (Vice), 29 (Laser)
Damage (Grenade): 40
Damage (Laser): 25
Drops: 19-35 ![]() Hallowed Bar, 20-40
Hallowed Bar, 20-40 ![]() Soul of Fright, 5-15
Soul of Fright, 5-15 ![]() Greater Healing Potions,
Greater Healing Potions, ![]() Mechanical Battery Piece
Mechanical Battery Piece (expert)
Recommended Equipment: See above section "Recommended Equipment for Hardmode Bosses"
Skeletron Prime is the hardmode version of Skeletron. Skeletron Prime behaves very similarly to its predecessor. It alternates between attacking with its various appendages and using a deadly spinning attack with its head. Skeletron Prime has a lot of health and can take a long time to kill. If Skeletron Prime is not defeated before the sun rises, it will use an attack that instantly kills the player on touch.
The damage from all of its arms can add up quickly. Try to destroy the arms before focusing on the head. The Prime Saw and Prime Vice are very difficult to avoid and should be destroyed first. The Prime Laser is only a medium threat and should be killed after the Vice and Saw, and the Prime Cannon can be ignored. There are two methods to avoiding Skeletron Prime's attacks. The first is to use the maximum speed of Lightning or Frostspark Boots to stay out of reach (Prime Saw will always be able to keep up), combined with well-timed jumps to throw off the aim of Skeletron Prime's spinning head attack. The second method is to use Gravitation potions for a similar effect, though it can be harder to dodge some of Skeletron Prime's attacks this way.
The last of the three mechanical bosses is the Twins. This boss is the hardest of the three for most players and should be defeated last. The Twins have a chance of spawning at sunset with the message "This is going to be a terrible night..." They can also be summoned by using a Mechanical Eye at night. The Twins are recommended for magic and summoning players, as the Rainbow Rod, Magical Harp, and Optic Staff will be very useful weapons later on.
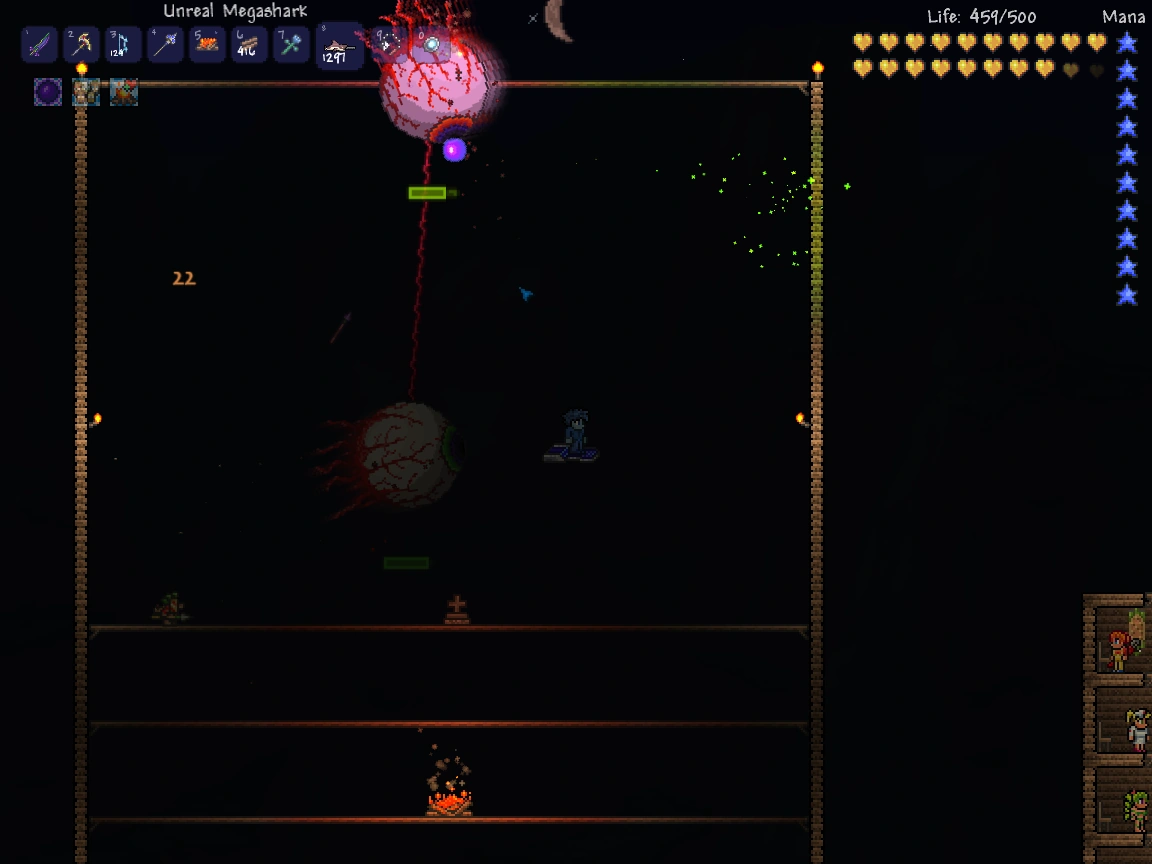

The Twins
Retinazer
Life: 20000
Defense: 10 (First Stage), 25 (Second Stage)
Damage (Melee): 50 (First Stage), 75 (Second Stage)
Damage (Laser): 20 (First Stage), 25 (Second Stage), 20 (Second Stage, Rapid Fire)
Spazmatism
Life: 23000
Defense: 10 (First Stage), 35 (Second stage)
Damage (Melee): 50 (First Stage), 75 (Second Stage)
Damage (Cursed Flame): 25 (First Stage), 30 (Second Stage)
Drops: 20-35 ![]() Hallowed Bar, 20-40
Hallowed Bar, 20-40 ![]() Soul of Sight, 5-15
Soul of Sight, 5-15 ![]() Greater Healing Potion,
Greater Healing Potion, ![]() Mechanical Wheel Piece
Mechanical Wheel Piece (Drops from last boss to be killed)
Recommended Equipment: See above section "Recommended Equipment for Hardmode Bosses"
The Twins are the hardmode version of Eye of Cthulhu. Both Twins will alternate between their signature attack (Laser for Retinazer, Cursed flame for Spazmatism), and charging at the player. The two choose attacks independently of the other. There will be times when one uses their signature while the other charges when they both use their signature, and when they both charge. When a Twin gets down to half health (12000 hp), it will transform into a more powerful second stage. Both will gain a rapid-fire version of their signature attack and a much more damaging melee attack in their second stages. The first Twin killed will not yield any drops. When the second Twin is killed, the listed drops will appear where it was killed. The eyes can be killed in any order. If the Twins are not defeated before the sun rises, they will run away.
Each twin is much more dangerous in its second stage. Focus on one Twin at a time, and only move on to the second Twin when the first is destroyed. Retinazer's stage one signature is less dangerous, so kill Spazmatism first. The Twins have a charging attack that is extremely difficult to dodge. This charging attack will cripple a player if they can't consistently dodge it. There are two methods to dodging the attacks, like with Skeletron Prime. The first method is to reach max running speed with Lightning or Frostspark Boots and use timed jumps to throw off the trajectory of the charge. Jump just as a Twin is about to start a charge while maintaining run speed. This will cause the charging Twin to charge too fast, and then attempt to correct it as they try to charge again. The second method is to use Gravitation Potions and constantly fall - they won't be able to catch up to you. If a Twin is off screen too long, it will despawn like any other enemy (only on console and mobile though). This can be used to make Spazmatism despawn and simplify the fight greatly.
Return to the Underground Jungle
Once any mechanical boss has been defeated, new challenges unlock, and the player gains access to new materials to work with, starting with the souls and bars dropped by the boss. Hallowed Bars can be used to craft Hallowed Armor and several melee weapons, but most importantly the Drax or Pickaxe Axe which will be used to harvest the next tier of ore. The new souls (Might, Fright, and Sight) are used to craft 2-3 new weapons and tools each.
Once all three mechanical bosses have been defeated, changes are made to the Underworld and the Underground Jungle, and a new event has a chance of occurring. The Pirate Invasion is dependent on an altar being smashed, and actually defeating a boss is unnecessary.
Monsters: Pirate Deckhand, Pirate Deadeye, Pirate Corsair, Pirate Crossbower, Pirate Captain, Parrot, Flying Dutchman
Monster Drops: ![]() Coin Gun,
Coin Gun, ![]() Lucky Coin,
Lucky Coin, ![]() Discount Card,
Discount Card, ![]() Cutlass,
Cutlass, ![]() Pirate Staff
Pirate Staff, ![]() Gold Ring
Gold Ring, Various Golden furniture, ![]() Sailor costume,
Sailor costume, ![]() Buccaneer costume
Buccaneer costume,
Recommended Armor: Hallowed Armor
Recommended Weaponry: Death Sickle, Chlorophyte Saber, Chlorophyte Partisan, Optic Staff, Golden Shower, Uzi, Megashark
A Pirate Invasion can occur after a player smashes one demon altar, or alternatively when the player uses a ![]() Pirate Map.
Pirate Map.
When a Pirate Invasion spawns or is summoned using a Pirate Map, a message will appear saying "Pirates are approaching from the (East/West)!" When the Pirates' initial wave reaches the spawn, their arrival is announced with "The Pirates have arrived!" See Pirate Invasion for more info and tips.
The Solar Eclipse is a very rare event and one recommended for melee characters. You may need to do many before obtaining every item. In the ![]() PC version the Solar Eclipse can be summoned manually using a Solar Tablet, which can be crafted with eight Solar Tablet Fragments. The fragments drop from Flying Snakes And Lihzahrds, and can be found in Lihzahrd Chests in the Jungle Temple.
PC version the Solar Eclipse can be summoned manually using a Solar Tablet, which can be crafted with eight Solar Tablet Fragments. The fragments drop from Flying Snakes And Lihzahrds, and can be found in Lihzahrd Chests in the Jungle Temple.
Monsters: Frankenstein, Swamp Thing, Reaper, Vampire, Eyezor, The Possessed, Fritz, Creature from the Deep, Mothron
Monster Drops:  Death Sickle,
 ![]() Moon Stone,
Moon Stone, ![]() Broken Bat Wing,
Broken Bat Wing, ![]() Eye Spring,
Eye Spring, ![]() Broken Hero Sword,
Broken Hero Sword, ![]() Neptune's Shell
Neptune's Shell
Recommended Equipment: Hallowed or Chlorophyte
Solar eclipses occur randomly at dawn and last throughout the day. The enemies here are extremely dangerous and it may require gear from the Hardmode Jungle and Dungeon to efficiently farm them. The Death Sickle is good for melee characters with its high DPS and piercing ability. Sword users should also take special note of the Broken Hero Sword that has a chance to drop from Mothron, a rare monster that can challenge newer players -- one can create the True Excalibur or True Night's Edge and then craft a Terra Blade. The Possessed, Fritz, and Creature From the Deep are exclusive to the ![]() PC version, making the Solar Eclipse much harder there. After defeating Plantera, Nailheads, Butchers, and Psychos begin to appear, making even the most well-equipped player thus far to reach for his Magic Mirror.
PC version, making the Solar Eclipse much harder there. After defeating Plantera, Nailheads, Butchers, and Psychos begin to appear, making even the most well-equipped player thus far to reach for his Magic Mirror.

The Underworld (Hardmode)
New Monsters: Lava Bat, Red Devil
Monster Drops: ![]() Magma Stone,
Magma Stone, ![]() Unholy Trident,
Unholy Trident, ![]() Fire Feather
Fire Feather
Recommended Equipment: Hallowed
Two new enemies now spawn in the Underworld. Lava Bats are simply a stronger version of the Hellbat. Red Devils are the real danger, being able to deal over 100 damage with their trident attack. It's recommended that the player does anything they need to do in the Underworld (such as farming the Wall of Flesh for its special drops) before defeating mechanical bosses; otherwise, doing anything here may become much harder.
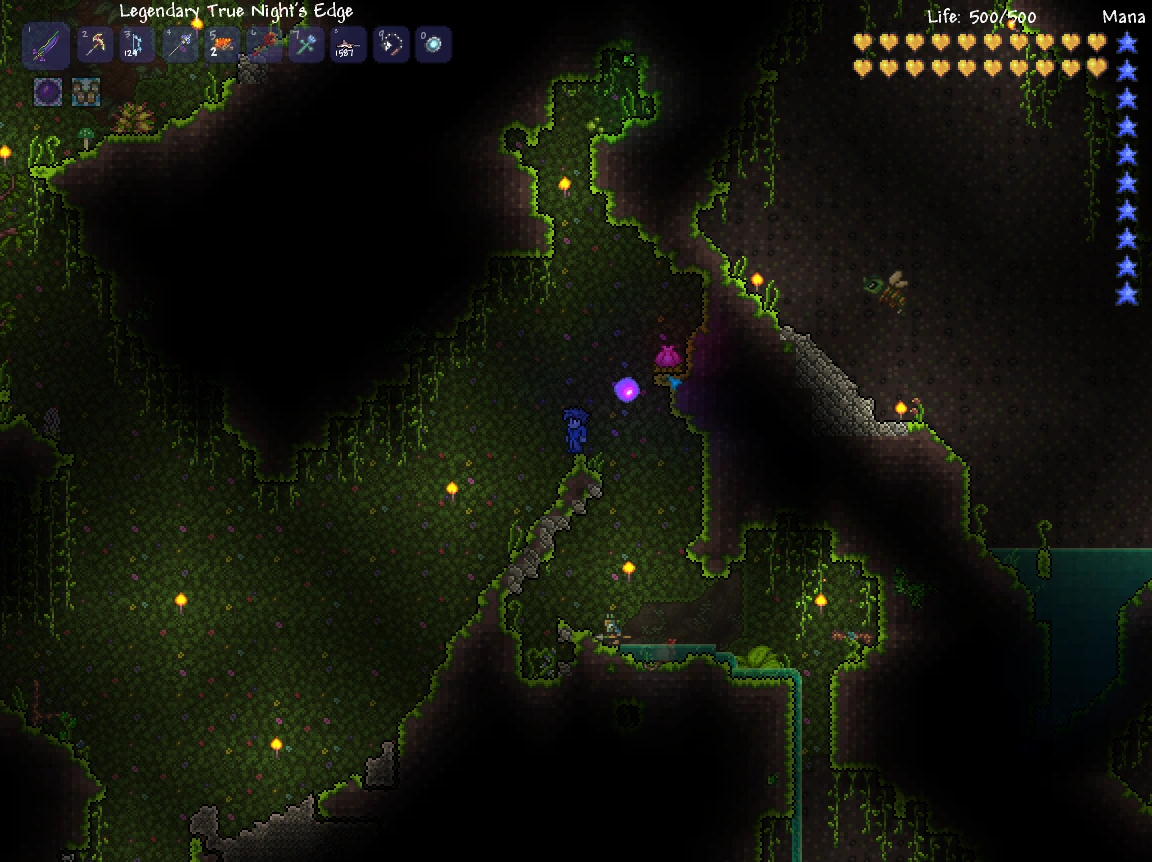
Underground Jungle (Hardmode)
New Monsters: Moth, Moss Hornet, Angry Trapper, Arapaima, Giant Tortoise
Monster Drops: ![]() Uzi,
Uzi, ![]() Bezoar,
Bezoar, ![]() Turtle Shell,
Turtle Shell, ![]() Butterfly Dust,
Butterfly Dust, ![]() Tattered Bee Wing,
Tattered Bee Wing, ![]() Yelets
Yelets
Notable Resources: ![]() Chlorophyte Ore,
Chlorophyte Ore, ![]() Life Fruit
Life Fruit
Recommended Equipment: Hallowed
Now that one or more of the mechanical bosses have been defeated, chlorophyte ore spawns throughout the underground jungle. Hardmode also makes it so that life fruits can occasionally be found growing amongst the foliage. Harvesting these two items should be a top priority. Life fruits increase the player's health by 5, up to a maximum of 500, and chlorophyte can be crafted into weapons and armor a step above hallowed equipment.
Players using melee or ranged weapons can make even better armor by acquiring an additional material. Creating a house in the glowing mushroom biome will spawn the Truffle NPC, who sells the autohammer. The autohammer turns chlorophyte bars into shroomite bars, which are used to create Shroomite armor, a great armor for ranged attackers. Giant Tortoise drop Turtle Shell, which when combined with Chlorophyte Bars make Turtle armor, a powerful melee armor set. Make note that the Autohammer cannot be purchased until Plantera has been defeated.
Plantera
Also found in the underground jungle is a mysterious purple bulb. Destroying this bulb with a drill or pickaxe summons the boss Plantera.
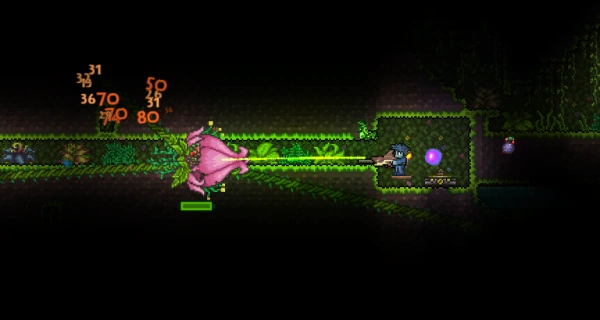
Plantera
Life: 30000
Defense: 14
Damage: 50
Drops: ![]() Temple Key,
Temple Key, ![]() Grenade Launcher,
Grenade Launcher, ![]() Pygmy Staff,
Pygmy Staff, ![]() Venus Magnum,
Venus Magnum, ![]() Nettle Burst,
Nettle Burst, ![]() Leaf Blower,
Leaf Blower, ![]() Flower Pow,
Flower Pow, ![]() Wasp Gun,
Wasp Gun, ![]() Seedling,
Seedling,  The Axe
Recommended Equipment: Chlorophyte or Turtle; piercing weapons
Plantera can be one of the easiest bosses if you have an arena. Simply bomb out a large cave (although of course, make sure NOT to accidentally destroy Plantera's Bulb) and put a short wall in the middle of the cave. Put platforms below the wall so that you have a place to grapple to, and summon Plantera. Run around the wall you built and you should be fine. (See also: Guide:Plantera strategies)
Upon defeating Plantera, the message "Screams are echoing from the dungeon..." appears, and powerful new enemies are added to the dungeon. The boss also drops the Temple Key, which is used to open the Jungle Temple.
Lihzahrd Temple
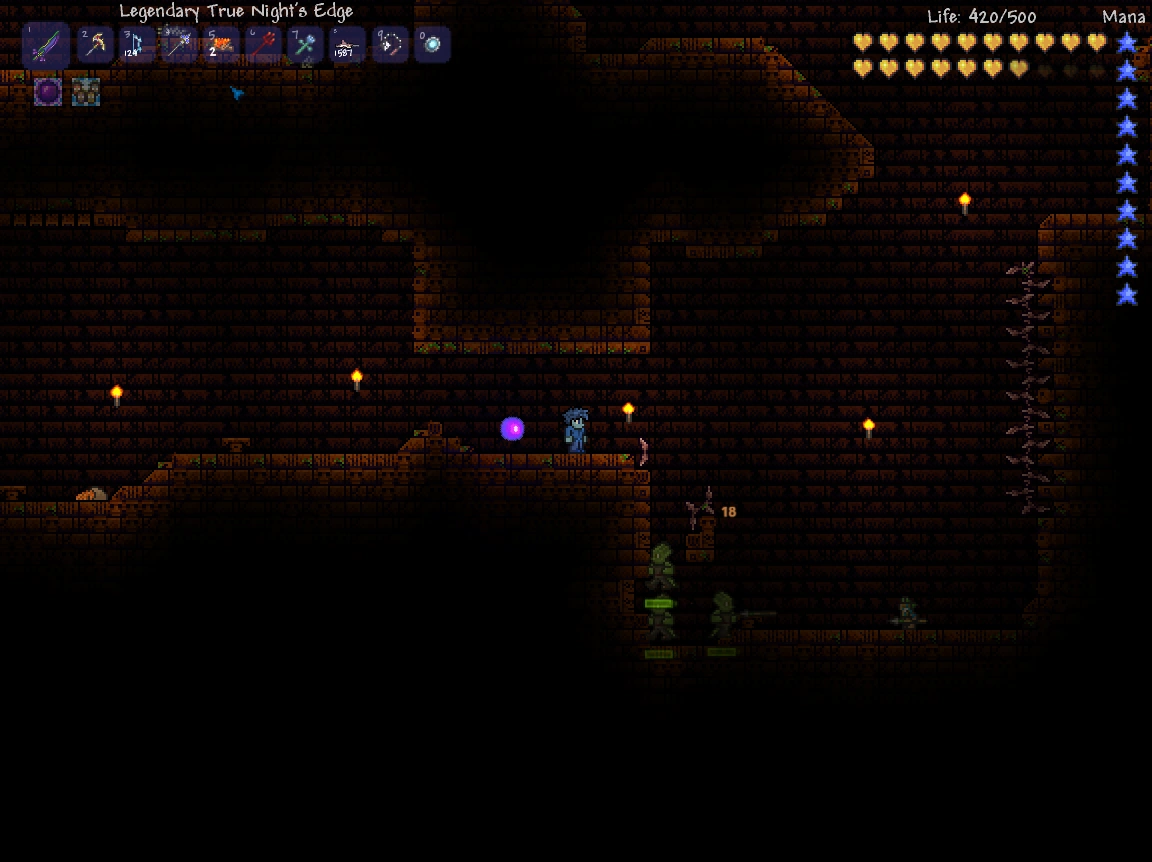
Lihzahrd Temple
Monsters: Lihzahrd (NPC), Flying Snake, Golem
Monster Drops: ![]() Lihzahrd Power Cell,
Lihzahrd Power Cell, ![]() Lizard Egg,
Lizard Egg, ![]() Solar Tablet Fragment
Solar Tablet Fragment
Recommended Equipment: Chlorophyte, Turtle, or Shroomite
After defeating Plantera, you will pick up a Temple Key that is used to unlock the door to the Lihzahrd (also known as the Jungle Temple). It is small compared to the normal dungeon, but it contains far more traps. In the console and mobile versions of Terraria, you can use two Teleporters to teleport into the temple.
Golem
At the bottom of the Lihzahrd, there is a boss room with a lihzahrd altar. Using a Lihzahrd Power Cell on it summons the Golem.
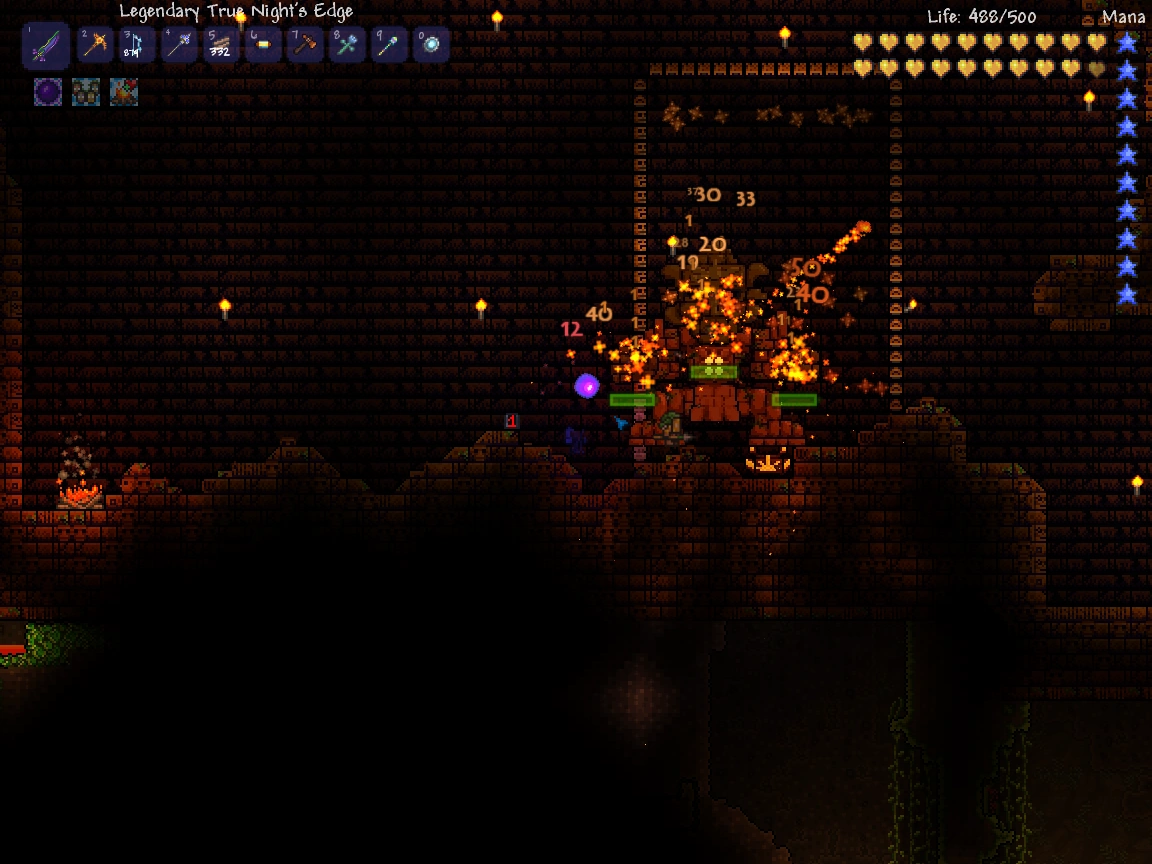

Golem
Life: 15000 (Head), 8000 (Body), 6000 (Fist)
Defense: 24
Damage: 70
Drops: ![]() Stynger with
Stynger with ![]() Stynger Bolt,
Stynger Bolt, ![]() Possessed Hatchet,
Possessed Hatchet, ![]() Sun Stone,
Sun Stone, ![]() Eye of the Golem,
Eye of the Golem, ![]() Picksaw,
Picksaw, ![]() Heat Ray,
Heat Ray, ![]() Staff of Earth,
Staff of Earth, ![]() Golem Fist,
Golem Fist, ![]() Golem Trophy,
Golem Trophy, ![]() Beetle Husk,
Beetle Husk, ![]() Shiny Stone
Shiny Stone (expert)
Recommended Equipment: Chlorophyte, Turtle, or Shroomite and post-Plantera weapons
Golem in its first stage is made significantly easier if the player focuses on destroying his fists before releasing his head's other attacks. Constant damage to the fists will nullify their attacks, leaving you free to attack at a range while avoiding his head's fireballs and lasers. In his second form, it is best to have built platforms to run underneath his jumping body Bowser-style while taking shots at him and avoiding his head attacks. This means that ranged attacks would be the safest strategy to beating him, providing you don't make too many mistakes and other mobs don't interfere. Note that his body has the ability to move midair, meaning that he can still change direction and land on you after running beneath him at a close distance.
The Golem drops the Picksaw, which enables the player to mine Lihzahrd Brick. The Stynger is a very effective explosive weapon. The Possessed Hatchet and Golem Fist are melee weapons with considerable range. Beetle Husk can make a great new melee armor. Heat Ray and Staff of Earth are efficient in the Hardmode Dungeon, where you should go next. The bonuses of the Sun Stone and Eye of the Golem will help as well.
See also: Guide:Golem strategies
Return to the Dungeon

Dungeon Biome (Hardmode)
New Monsters: Rusty Armored Bones, Blue Armored Bones, Bone Lee, Paladin, Tactical Skeleton, Dungeon Spirit, Skeleton Commando, Necromancer, Giant Cursed Skull, Diabolist, Ragged Caster, Skeleton Sniper
Monster Drops: ![]() Shadowbeam Staff,
Shadowbeam Staff,  Keybrand,
 ![]() Ectoplasm,
Ectoplasm, ![]() Sniper Rifle,
Sniper Rifle, ![]() Rifle Scope,
Rifle Scope, ![]() Tactical Shotgun,
Tactical Shotgun, ![]() Paladin's Shield,
Paladin's Shield, ![]() Paladin's Hammer,
Paladin's Hammer, ![]() Wisp in a Bottle,
Wisp in a Bottle, ![]() Magnet Sphere,
Magnet Sphere, ![]() Tabi,
Tabi, ![]() Black Belt,
Black Belt, ![]() Spectre Staff,
Spectre Staff, ![]() Inferno Fork
Inferno Fork
Recommended Equipment: Chlorophyte, Shroomite, Turtle, Beetle
After defeating Plantera, the dungeon's difficulty increases dramatically. There are stronger enemies and new drops from each. Also, note that the dungeon has 5 biome-related chests. To unlock each one, you may need to defeat many of the respective biome's enemies to get a key, which is used to unlock the respective chest. Dungeon Spirits, which may spawn after the player kills enemies in the dungeon, drop Ectoplasm, which is used to craft Spectre armor, a great armor for mages.
Duke Fishron
Duke Fishron
Life: 50000
Defense: 50
Damage: 100 (melee)
Drops: ![]() Flairon,
Flairon, ![]() Tsunami,
Tsunami, ![]() Razorblade Typhoon,
Razorblade Typhoon, ![]() Tempest Staff,
Tempest Staff, ![]() Bubble Gun,
Bubble Gun, ![]() Fishron Wings,
Fishron Wings, ![]() Shrimpy Truffle
Shrimpy Truffle (expert)
Recommended Melee Equipment: Turtle or Beetle armor, and ![]() Vampire Knives
Vampire Knives
Recommended Ranged Equipment: Shroomite armor and ![]() Stynger
Stynger
Recommended Magic Equipment: Spectre armor (Hood), ![]() Bat Scepter,
Bat Scepter, ![]() Golden Shower (maybe);
Golden Shower (maybe); ![]() Celestial Cuffs
Celestial Cuffs, ![]() Sorcerer Emblem or
Sorcerer Emblem or ![]() Celestial Stone;
Celestial Stone; ![]() Magic Power Potion,
Magic Power Potion, ![]() Mana Regeneration Potion,
Mana Regeneration Potion, ![]() Crystal Ball
Crystal Ball
Recommended Accessories (all classes): Hoverboard (or any ![]() Wings,
Wings, ![]() Frostspark Boots,
Frostspark Boots, ![]() Destroyer Emblem,
Destroyer Emblem, ![]() Tabi /
Tabi / ![]() Master Ninja Gear,
Master Ninja Gear, ![]() Shield of Cthulhu
Shield of Cthulhu (expert)
Recommended Buff Potions (all classes): Ironskin, Regeneration, Swiftness, Thorns, Water Walking, Well Fed, Wrath, Rage, Lifeforce, Endurance, Summoning, Gravitation (optional)
Duke Fishron is one of the hardest bosses in the game as of 1.3.3.3. Just summoning the Duke is a significant challenge in itself, as you will need to capture the wily and elusive Truffle Worm. The spawn rates in naturally occurring Underground Mushroom biomes are low, and if you intend on getting the Fishron Wings (1/15 chance), as well as all his drops, you’ll need to defeat him on average 10 times. Add in a few more for the times you die and because the RNG hates you, and you could easily be looking at 20-25 truffle worms needed. Trying to net that many manually, even with the help of a Clentaminator, Golden Bug Net and Blue Solution, is tedious and frankly boring. Your best bet is to build a Truffle Worm farm, for which you can find a guide here.
Once you’ve collected sufficient Truffle Worms, you should select your class. Melee, ranged, and magic are all viable options. Ironically, the ranger, which has up until now been a mainstay of boss fights, is probably the worst option. Although the Ranger is still great at dealing high DPS, the lack of a self-healing attack, unlike the other two, also makes this the most dangerous approach, and with the Duke’s extremely high damage, leaves you very little margin for error. If you're a ranger, make one mistake and you’re dead. Melee using Vampire Knives is the second option, which is relatively safe. And despite Spectre armor (Hood) getting its damage nerfed by 40%, and mana potions nerfed a further 25%, the magic approach is probably still the best one (which goes to show how overpowered it was). As of 1.3, the new magic weapon Life Drain, with a 20% drop rate from the difficult Crimson Mimic, can serve as a magical replacement for the Vampire Knives, and can be obtained earlier in Hardmode by farming for Souls of Night, crafting a Key of Night, and farming Crimson Mimics. However, know that whereas the Vampire Knives' regenerative powers are proportional to damage, Life Drain simply provides faster regeneration, which may not be enough to save the player from death.
Unlike most boss fights, an arena is of little help. Duke Fishron seems to have been designed with the intention of being farm-proof (he’s not), and if you sit still or linger in the same area, he can literally take you from a full 600hp to zero in two seconds flat in his second stage, whereas if you keep moving and keep your distance, you shouldn’t take much damage. It is important to keep in mind that if you move too far away from him that he will despawn, wasting a precious Truffle worm.
Once you’re ready to fight the Duke, summon him by fishing in the Ocean using a Truffle Worm as bait. From there, the best strategy is to just continually run away while firing until he’s dead. Don’t stop moving at any time or you’ll die. In theory it’s best to use a Gravitation Potion for maximum mobility, but in reality you may actually have very little experience using Gravitation Potions, as they can be disorienting, you can run into floating islands, mountains, or worst, lakes (which will kill you), you can’t fly too high or you will float, and it will be very difficult to dodge (which will kill you). With Wings and Frostspark Boots, you’re very mobile on the ground too and both approaches are viable, so go with what you’re most comfortable with. The Tabi/Master Ninja Gear will allow you to dash out of the way of his more lethal attacks, but be wary of accidentally dashing into a Sharknado. If you have the Shield of Cthulhu, you are even better off, as it allows to dash into him without taking damage (if timed correctly). This can actually be a reliable lifesaver from his quick lunging attacks during his second stage, especially on expert mode (3rd stage). Note that of 1.3 if the player leaves the Ocean Biome Duke Fishron's defense and attack will double, making fighting across the map an invalid option. The best option as of the latest update will be to build platforms over the Ocean Biome and begin building a flexible arena.
Although Duke Fishron is a very difficult boss, he’s probably still easier than the Lunar Events and it’s probably best to beat him before taking on the Events. However, if you find yourself stuck attempting and failing to kill him, the Lunar Events may be the only other option to continue. If you do undergo the events, it's best to defeat your class's pillar (Vortex for ranged, Nebula for magic, Solar for melee, and Stardust for Summoner). Defeating a Pillar once allows the crafting of one of the Lunar Weapons. An optional detour is to defeat the Stardust Pillar to gain a powerful minion (Stardust Dragon or Stardust Cell) to aid you in the fight. BEWARE: if you defeat all Lunar Pillars, the Moon Lord will spawn, and chances are if you can't defeat Fishron, you have an even lower chance of defeating the Moon Lord. If you’re fighting Duke Fishron multiple times, the fight will be somewhat easier once you've acquired his weapon drops and wings.
For more strategies to defeat the Duke, see Guide:Duke Fishron strategies.
The Pumpkin Moon
Pumpkin Moon
Monsters: Scarecrow, Splinterling, Hellhound, Poltergeist, Mourning Wood, Headless Horseman, Pumpking
Monster Drops: ![]() Scarecrow costume,
Scarecrow costume, ![]() Spooky Wood,
Spooky Wood, ![]() Cursed Sapling,
Cursed Sapling, ![]() Spooky Twig,
Spooky Twig, ![]() Spooky Hook,
Spooky Hook, ![]() Necromantic Scroll,
Necromantic Scroll, ![]() Stake Launcher,
Stake Launcher, ![]() Mourning Wood Trophy,
Mourning Wood Trophy, ![]() Jack 'O Lantern Mask,
Jack 'O Lantern Mask,  The Horseman's Blade,
 ![]() Pumpking Trophy,
Pumpking Trophy, ![]() Candy Corn Rifle,
Candy Corn Rifle, ![]() Raven Staff,
Raven Staff, ![]() Jack 'O Lantern Launcher,
Jack 'O Lantern Launcher, ![]() Bat Scepter,
Bat Scepter, ![]() Black Fairy Dust,
Black Fairy Dust, ![]() Spider Egg
Spider Egg
Recommended Equipment: Chlorophyte, Turtle, Spectre, or Shroomite
The Pumpkin Moon is summoned at night using the ![]() Pumpkin Moon Medallion. Unlike the Blood Moon and Solar Eclipse, enemies appear in up to 15 consecutive waves, similar to an invasion. During this event, the moon turns orange with a jack 'o lantern face.
Pumpkin Moon Medallion. Unlike the Blood Moon and Solar Eclipse, enemies appear in up to 15 consecutive waves, similar to an invasion. During this event, the moon turns orange with a jack 'o lantern face.
See also: Guide:Pumpkin Moon strategies
The Frost Moon

Frost Moon
Monsters: Present Mimic, Flocko, GingerBread, Zombie Elf, Elf Archer, Nutcracker, Yeti, Elf Copter, Everscream, Krampus, Ice Queen, Santa-NK1
Monster Drops:  Christmas Tree Sword,
 ![]() Festive Wings,
Festive Wings, ![]() Razorpine,
Razorpine, ![]() Christmas Hook,
Christmas Hook, ![]() Everscream Trophy,
Everscream Trophy,  Blizzard Staff,
  North Pole,
 ![]() Ice Queen Trophy,
Ice Queen Trophy, ![]() Snowman Cannon,
Snowman Cannon, ![]() Baby Grinch's Mischief Whistle,
Baby Grinch's Mischief Whistle, ![]() Reindeer Bells,
Reindeer Bells, ![]() Elf Melter,
Elf Melter, ![]() Chain Gun,
Chain Gun, ![]() Santa-NK1 Trophy
Santa-NK1 Trophy
Recommended Equipment: Chlorophyte, Turtle, Spectre, or Shroomite
The Frost Moon is summoned at night using the ![]() Naughty Present. It is one of the most difficult events in the game, as it is meant for endgame players. Like the Pumpkin Moon, enemies appear in 15 standard waves as well as 5 extra bonus waves. During this event, the moon changes color to look like the face of a snowman.
Naughty Present. It is one of the most difficult events in the game, as it is meant for endgame players. Like the Pumpkin Moon, enemies appear in 15 standard waves as well as 5 extra bonus waves. During this event, the moon changes color to look like the face of a snowman.
See also: Guide:Frost Moon strategies
Martian Madness
Monsters: Brain Scrambler, Gray Grunt, Ray Gunner, Martian Officer, Martian Engineer, Gigazapper, Tesla Turret, Martian Walker, Scutlix, Martian Saucer
Monster Drops: ![]() Martian Conduit Plating
Martian Conduit Plating, ![]() Martian Costume
Martian Costume, ![]() Laser Machinegun
Laser Machinegun, ![]() Xenopopper
Xenopopper, ![]() Cosmic Car Key
Cosmic Car Key, ![]() Laser Drill
Laser Drill, ![]() Electrosphere Launcher
Electrosphere Launcher, ![]() Charged Blaster Cannon
Charged Blaster Cannon,  Influx Waver
, ![]() Anti-Gravity Hook
Anti-Gravity Hook, ![]() Martian Saucer Trophy
Martian Saucer Trophy
Recommended Equipment:Shroomite Armor, Turtle Armor, Beetle Armor, Spectre Armor
Martian Madness is an invasion-type event that can happen after defeating Golem. Occasionally, in the outer two-thirds of your map, a Martian Probe will randomly appear. If it scans you and escapes, the event will start. This event cannot be triggered manually.
The Lunatic Cultist
Life: 32000
Damage: 50
Defense: 42
Minions: Phantasm Dragon, Ancient Vision
Drops: ![]() Ancient Manipulator
Ancient Manipulator, ![]() Ancient Cultist Mask,
Ancient Cultist Mask, ![]() Ancient Cultist Trophy
Ancient Cultist Trophy, ![]() Greater Healing Potions
Greater Healing Potions
The Lunatic Cultist is a boss summoned by killing the four Cultists that spawn at the Dungeon after defeating Golem. Once the Lunatic Cultist is defeated, the Lunar Events will start.
See also: Guide:Lunatic Cultist strategies
The Celestial Pillars
Once the Lunatic Cultist is defeated, four pillars will spawn in the world. These can easily be found with the map. Be sure to pick up the Ancient Manipulator the Cultist drops, as it is needed to craft end-game gear.
Chances are that you will be near a pillar when they spawn. The pillars represent the four classes: Solar for melee, Vortex for ranged, Nebula for magic, and Stardust for summoning. There is no set order necessary to kill them, but it is preferable to take on the one corresponding to your class first, then the Stardust Pillar to get the powerful Stardust Dragon Staff.
Life: 20000
Defense: 20
Damage: 0 (melee), 90 (solar flare)
Minions: Selenian, Drakanian, Corite, Sroller, Drakomire, Crawltipede
Drops: ![]() Solar Fragment
Solar Fragment (12-60) 18-90
Recommended Melee Equipment: Turtle or Beetle armor, and Vampire Knives, North Pole, Paladin's Hammer, Scourge of the Corruptor, Influx Waver
Recommended Ranged Equipment: Shroomite armor and Stynger, Megashark, Chain Gun, Electrosphere Launcher, Tsunami, Sniper Scope
Recommended Magic Equipment: Spectre armor (Hood)/(Mask), Razorblade Typhoon, Laser Machinegun, Blizzard Staff, Bat Scepter, Golden Shower, Celestial Cuffs, Sorcerer Emblem or Celestial Stone, Razorpine, Bubble Gun, Magic Power Potion, Mana Regeneration Potion, Crystal Ball
Recommended Accessories (all classes): Frostspark Boots, Star Veil
Recommended Buff Potions (all classes): Ironskin, Regeneration, Swiftness, Thorns, Well Fed, Wrath, Rage, Lifeforce, Endurance, Summoning.
The Solar Pillar is a tough one to crack, and, like all the Pillars, you will be under constant attack from its minions.
To make the Solar Pillar (or any pillar) vulnerable, you must kill 100 (150 on Expert) of its minions to deactivate its shield, allowing it to be harmed directly.
Try to stay out of the air around the Solar Pillar if possible, because the Crawltipedes will swarm and kill you quickly otherwise. If need be, aim at their weak spot, the tail, to kill them. This will give you a small window to take flight before another spawns.
Be sure to also be wary of the Corites that spawn as well, because their charge attack can be deadly, or even fatal when they gang up on you.
Because many of the enemies from this pillar cannot pass through solid blocks, it's recommended that you attempt to find an area where most mobs will have trouble reaching you, but where you can reach them. If possible, try to obtain a weapon that can pass through walls, such as the Nettle Burst or Flying Dragon.Once the first pillar is defeated, the chat will display the status message "Your mind goes numb…"
Life: 20000
Defense: 20
Damage: 0
Minions: Vortexian, Storm Diver, Alien Hornet, Alien Queen
Drops: ![]() Vortex Fragment
Vortex Fragment (12-60) 18-90
Recommended Melee Equipment: Turtle or Beetle armor, and Vampire Knives
Recommended Ranged Equipment: Shroomite armor and Stynger, Megashark
Recommended Magic Equipment: Spectre armor (Hood)/(Mask), Bat Scepter, Golden Shower, Celestial Cuffs, Sorcerer Emblem or Celestial Stone, Razorpine/Bubble Gun, Magic Power Potion, Mana Regeneration Potion, Crystal Ball
Recommended Accessories (all classes): Wings, Frostspark Boots, Master Ninja Gear (Black Belt), Star Veil
Recommended Buff Potions (all classes): Ironskin, Regeneration, Swiftness, Thorns, Well Fed, Wrath, Rage, Lifeforce, Endurance, Summoning.
Like every Pillar, to make the Vortex Pillar susceptible to damage, you must defeat 100 (150 on Expert) minions to deactivate its shield.
Try to take out the Storm Divers first, as they have a very strong shotgun attack that can deal large amounts of damage.
Gravity is distorted around areas of the Vortex Pillar as well, so beware of these areas. Because this is a ranged pillar, you will find that many of the enemies are going to fire volleys of projectiles at you. Due to this, it is recommended you have a Black Belt or a Master Ninja Gear, so you can have a slight chance to dodge these attacks.
Once the second Pillar has been defeated, the status message "You are overwhelmed with pain..." appears.
Life: 20000
Defense: 20
Damage: 0
Minions: Nebula Floater, Brain Suckler, Predictor, Evolution Beast
Drops: ![]() Nebula Fragment
Nebula Fragment (12-60) 18-90
Recommended Melee Equipment: Turtle or Beetle armor, and Vampire Knives
Recommended Ranged Equipment: Shroomite armor and Stynger, Megashark
Recommended Magic Equipment: Spectre armor (Hood)/(Mask), Bat Scepter, Golden Shower, Celestial Cuffs, Sorcerer Emblem or Celestial Stone, Razorpine/Bubble Gun, Magic Power Potion, Mana Regeneration Potion, Crystal Ball
Recommended Accessories (all classes): Wings, Master Ninja Gear (Black Belt), Frozen Turtle Shell
Recommended Buff Potions (all classes): Ironskin, Regeneration, Swiftness, Thorns, Well Fed, Wrath, Rage, Lifeforce, Endurance, Summoning.
Like every Pillar, to make the Nebula Pillar susceptible to damage, you must defeat 100 (150 on Expert) minions to deactivate its shield.
Kill the Brain Sucklers that fly at you to prevent them from latching onto your head. If they do, aim your weapon above you to knock them off, or simply swing any regular sword/ melee weapon. The Nebula Floaters are tricky, as they will randomly teleport around. Take them out quickly, and dodge their beam attacks.
With this pillar, it is best to avoid the ground. Predictors and Evolution Beasts can make quick work of any player ground-bound, so sticking to the air is best. This is because Brain Sucklers have no projectile attack, and are relatively easy to kill. If the player is skilled, the pillar can be defeated relatively easily.
Once the third Pillar is defeated, the status message "Otherworldly voices linger around you..." will appear.
Life: 20000
Defense: 20
Damage: 0
Minions: Star Cell, Flow Invader, Twinkle Popper, Stargazer, Milkyway Weaver
Drops: Stardust Fragment (12-60) 18-90
Recommended Melee Equipment: Turtle or Beetle armor, and Vampire Knives
Recommended Ranged Equipment: Shroomite armor and Stynger, Megashark
Recommended Magic Equipment: Spectre armor (Hood)/(Mask), Bat Scepter, Golden Shower, Celestial Cuffs, Sorcerer Emblem or Celestial Stone, Razorpine/Bubble Gun, Magic Power Potion, Mana Regeneration Potion, Crystal Ball
Recommended Accessories (all classes): Wings
Recommended Buff Potions (all classes): Ironskin, Regeneration, Swiftness, Thorns, Well Fed, Wrath, Rage, Lifeforce, Endurance, Summoning.
Like every Pillar, to make the Stardust Pillar susceptible to damage, you must defeat 100 (150 on Expert) minions to deactivate its shield.
Take out the Star Cells quickly so they don't overwhelm you, but be sure to also kill the little ones they split into as well. If left to long, these will grow into full-sized Star Cells again- The Milkyway Weavers are a big threat, as unlike normal worm AI, they can follow you into the air. Attack their head to kill them easily. The Stargazers should not be taken lightly either, as they have a beam attack that could easily drain a player's health.
If you are experienced, you may want to herd together a group of Star Cells and only kill a few small ones, then wait for them to regrow. Using this, you can max out the spawn limit such that nothing else can spawn, and farm out the Star Cells until the Pillar is vulnerable.
Once the final Pillar is defeated, the status message "Impending doom approaches..." will appear. About a minute later, the Moon Lord will spawn. It is recommended to have potions for the fight, as he will easily kill you if you are not prepared.
The Moon Lord
For more elaborate strategies on defeating Moon Lord, including Weapon and Arena recommendations, see Guide:Moon Lord strategies.
The Moon Lord, bearing a striking resemblance to Cthulhu but confirmed not to be by the developers (although at health thresholds it spawns True Eye of Cthulhus), is summoned directly after defeating the final Celestial Pillar and serves as Terraria's final boss as of version 1.3.
Life: Total: 145,000 / 217,500 , Head: 45,000 / 67,500, Hands (2): 25,000 / 37,500, Core: 50,000 / 75,000
Damage:
- All:
- 0 (melee)
- Head:
- Hands
- Phantasmal Sphere:
- 100 / 200
- Phantasmal Sphere:
Phantasmal Eye:
Defense: Head: 50, Hands: 40, Core: 70
Minions: True Eye of Cthulhu, Moon Leech Clot
Drops: ![]() Moon Lord Mask
Moon Lord Mask, ![]() Luminite
Luminite (70-90),  Portal Gun
,  Meowmere
, ![]() Terrarian
Terrarian, ![]() Star Wrath
Star Wrath, ![]() S.D.M.G.
S.D.M.G., ![]() Celebration
Celebration, ![]() Last Prism
Last Prism, ![]() Lunar Flare
Lunar Flare, ![]() Rainbow Crystal Staff
Rainbow Crystal Staff, ![]() Lunar Portal Staff
Lunar Portal Staff, ![]() Moon Lord Trophy
Moon Lord Trophy, ![]() Greater Healing Potions (5-15)
Greater Healing Potions (5-15)
Recommended Buffs: Lifeforce, Ironskin, Rage/Wrath, Endurance, Regeneration, Ammo Reservation/Ammo Box (for ranged players, Bewitched/Bewitching Table (all players), Swiftness (doesn't affect mounts)
There's a reason the developers chose him to be the game's "final boss". Similar to Duke Fishron, the boss sweeps side to side, taking up the entire screen and making arenas less effective than with other bosses. Recommended arenas include a minecart track or an asphalt skybridge, running along the length of the world for maximum damage output. Its defeat means subsequent runs will be easier with its drops but still provides quite a challenge even with the best gear. Luminite is used to craft end-game gear and mounts, including the Drill Containment Unit, which requires 40 Luminite Bars, or ~two Moon Lord defeats. To craft all items with Luminite, 1088 ores are required, meaning Moon Lord must be defeated 13-16 times in Normal Mode.
The Post-Game
After defeating the moon invasions and acquiring all their drops, the player is free to do anything. You could try designing an ultimate castle or PvP with other top-tier players, or even overcome incredibly difficult challenges (e.g. Frost Moon wave 15+ with Ranger, no arena.) The only end is the player's imagination!
Some things you might try:
- Purify the Corruption or Crimson biomes
- Reach top tier in Fishing and acquire the Hotline Fishing Hook/Golden Fishing Rod.
- Beat multiple Bosses at once.
- Complete all the achievements.
- Defeat the Dungeon Guardian.
- Play on an online server.
- Explore player-made custom maps and content.
- Make your own theme park using minecarts.
- Experiment with the extremely elaborate combinations possible with wiring and teleporters, such as making your own in-game computer!
- Try to complete the game as different Classes.
- Do a hardcore playthrough.
- Do speed runs.
- Play, design, and/or create new PvP modes for all to enjoy!
- Acquire every single weapon and tool.
- Obtain every single armor and vanity set.
- Gather up every single accessory and dye.
- Collect every single Trophy and Banner.
- Play through the game on Expert Mode.
- Seek out the rarest items in the game, such as the Nymph Banner or Slime Staff.
- Find bugs and glitches so developers can fix them.
- Create a mod or texture pack, or maybe an adventure/puzzle map.
- Become a wiki contributor!
Template:Translation project